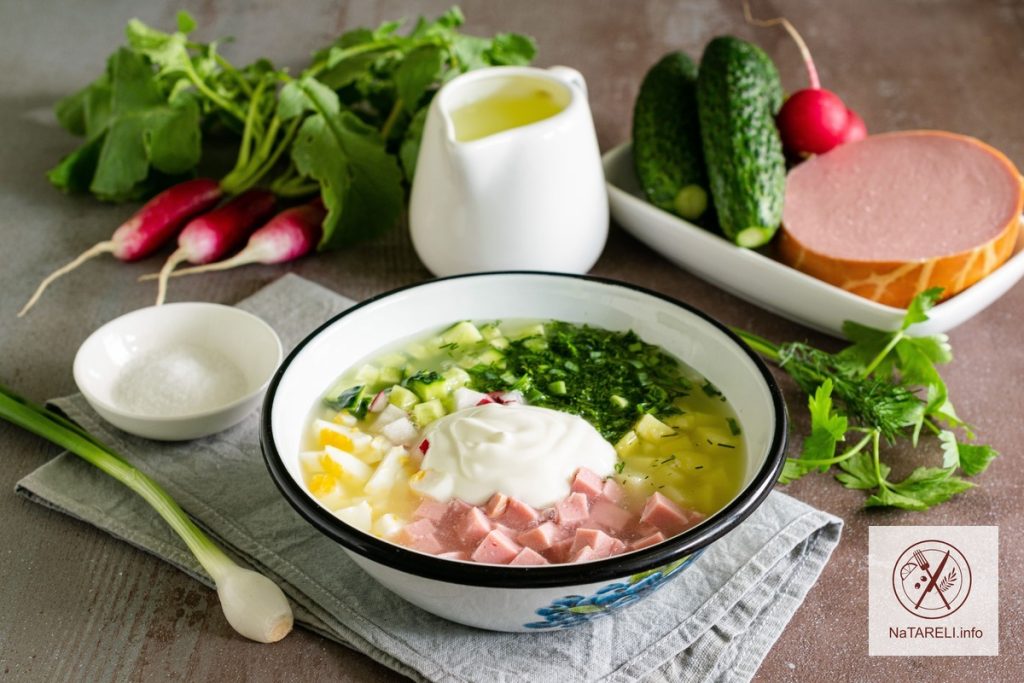
Okroshka with whey and sausage

With the arrival of warm spring days, I want something light and refreshing. My favorite among cold soups is okroshka. It is prepared with different dressings: kefir or mineral water, sour cream with sparkling water, whey or kvass. Today I will tell you how to cook okroshka using whey, this recipe is one of my favorites. If desired, the sausage can be replaced with boiled chicken fillet or beef. You can also use ham, boiled beef or pork tongue.

In the recipe I indicated the proportions that my family likes. If you wish, you can reduce or increase the amount of certain ingredients. For example, add more vegetables, sausages or meat products. To prepare okroshka, the best quality doctor’s, milk or children’s sausage from a trusted manufacturer is best.

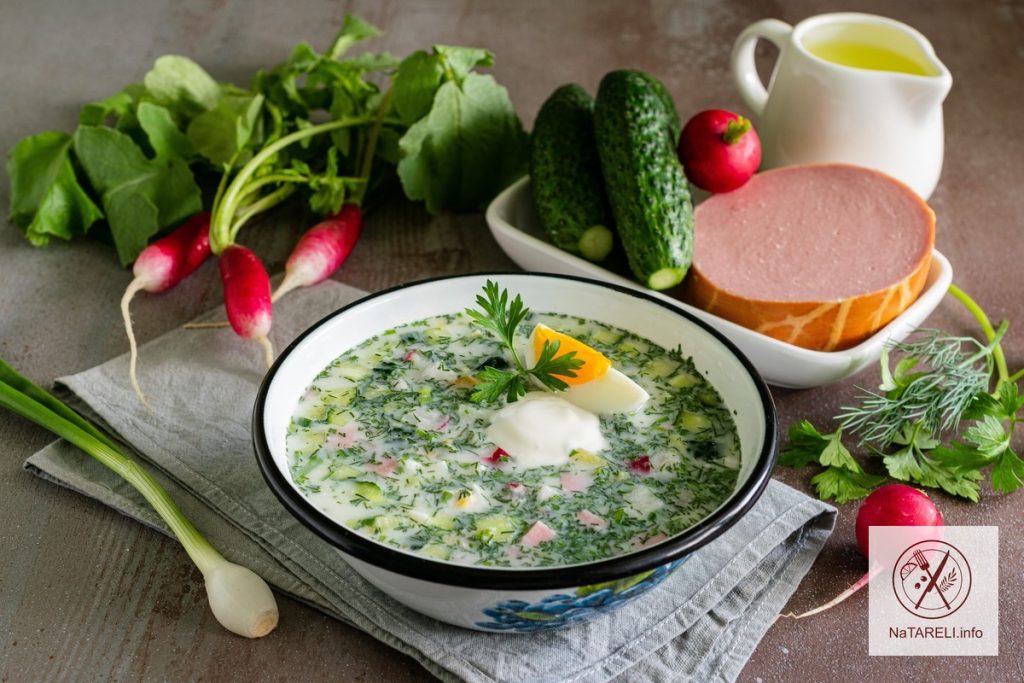
Okroshka turns out to be both refreshing and satisfying, tasty and aromatic thanks to the large amount of herbs and fresh vegetables.

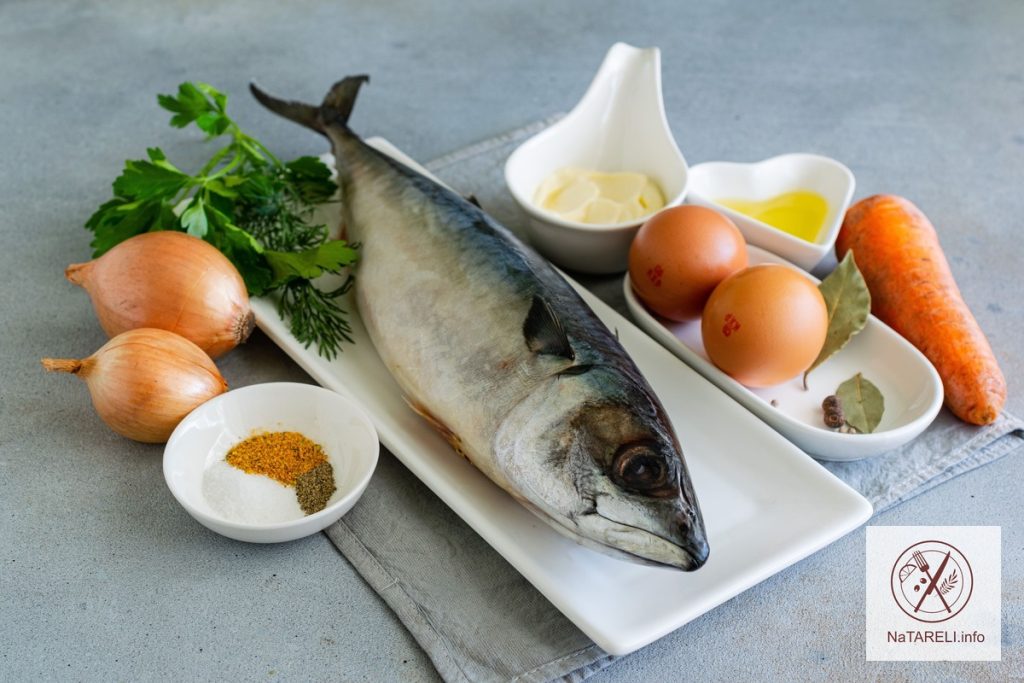
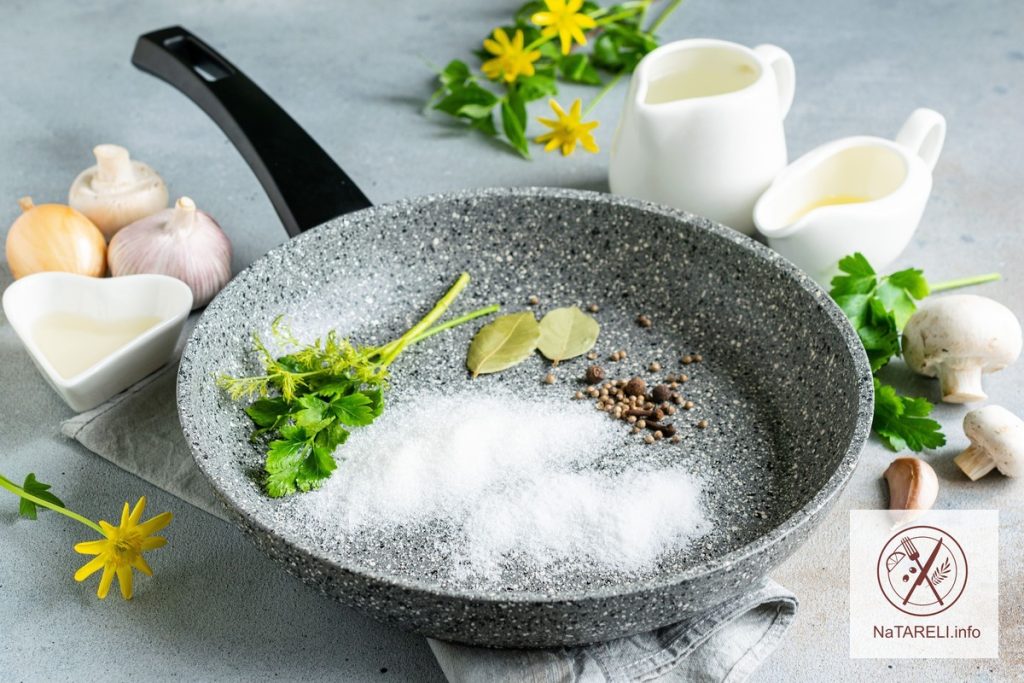
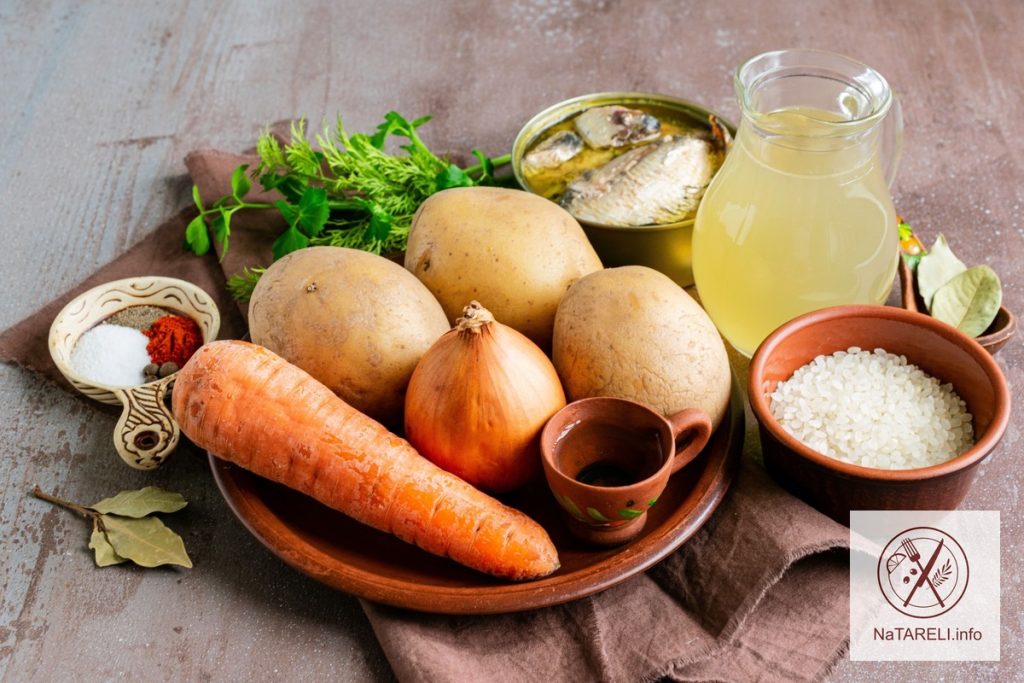
Ingredients for making whey-based okroshka with sausage:

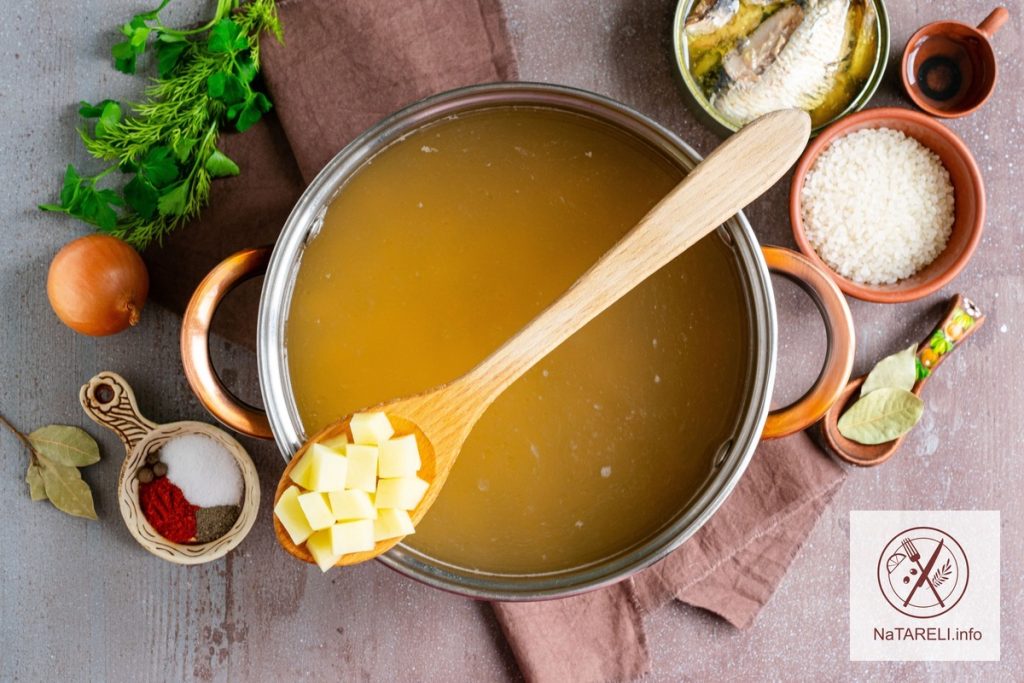
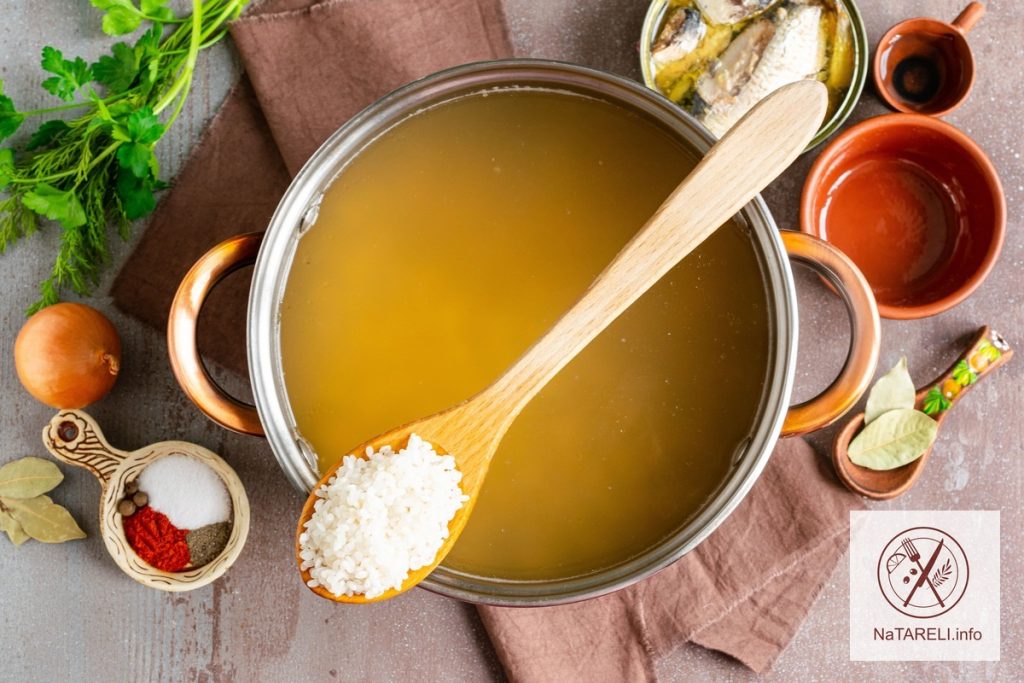
Recipe for making whey-based okroshka with sausage

Step-by-step instruction:

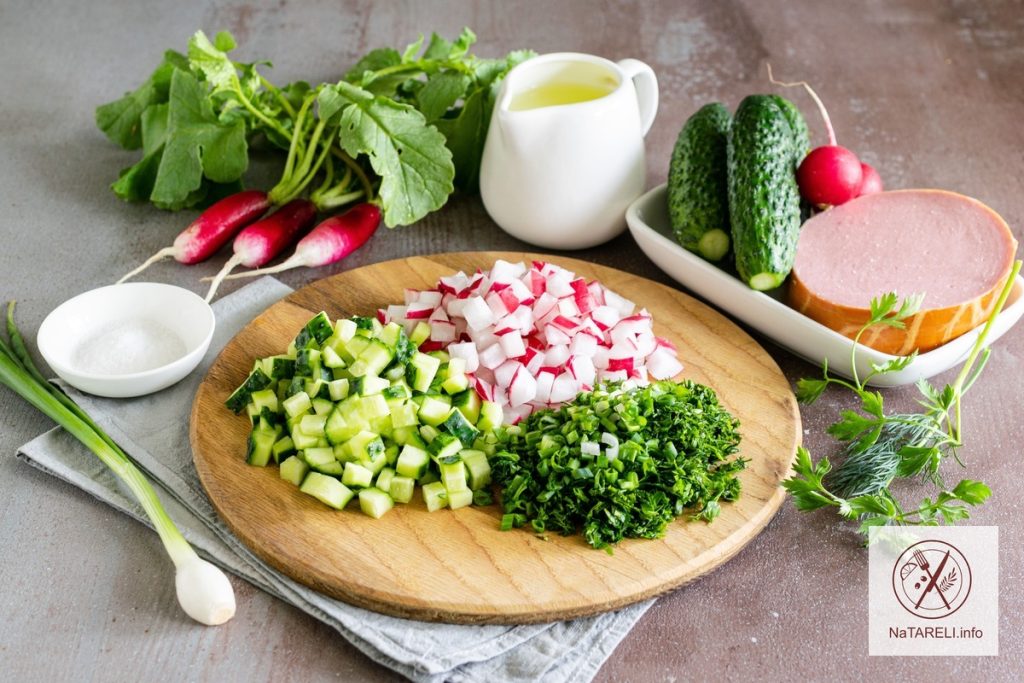
1. Wash fresh cucumbers and radishes, trim off the tails and cut into small cubes. Wash the green onions and cut them into thin rings. Wash the dill and parsley, dry off excess moisture, and chop finely.

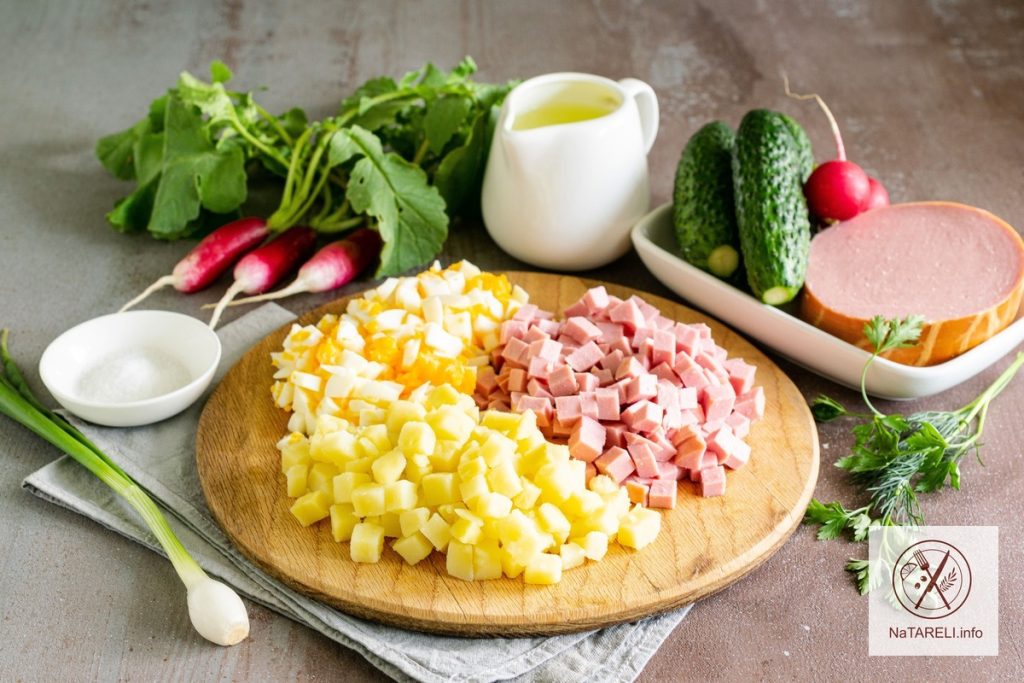
2. Wash the potatoes and boil them in salted water until tender. Cool the tubers to room temperature, peel them, and cut them into small cubes. Boil chicken eggs hard, cool in cold water, peel, and cut into small cubes. We peel the boiled sausage from the casing and cut it into cubes the same size as the rest of the ingredients.

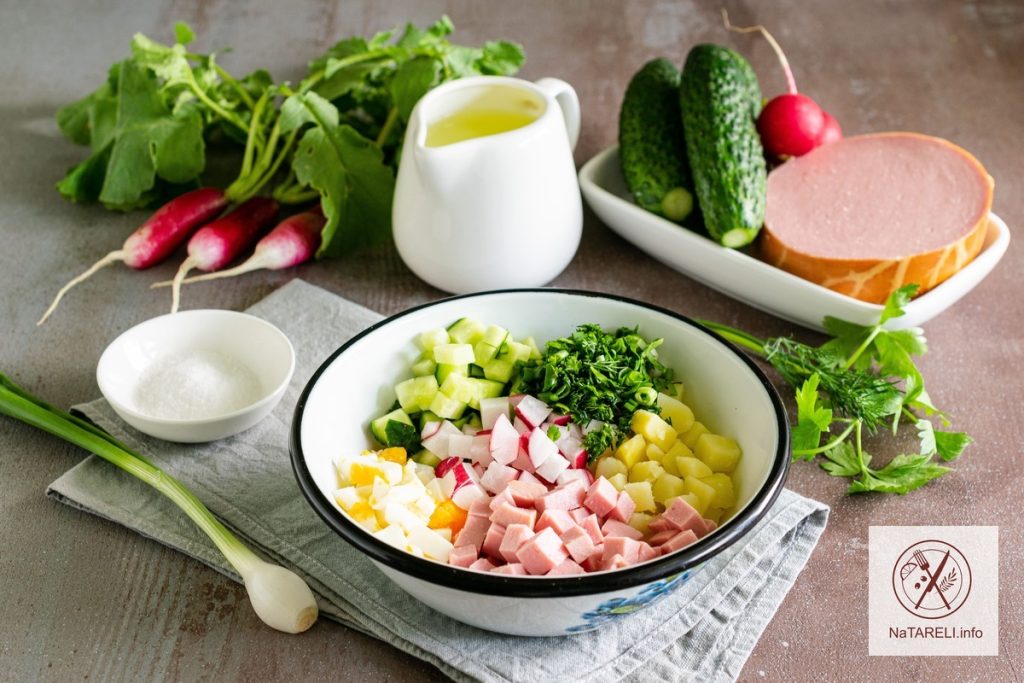
3. In a deep bowl, mix chopped vegetables, eggs, boiled sausage and herbs in equal proportions. If desired, the quantity of certain ingredients can be adjusted to your taste.

4. Fill the ingredients with cold whey. Salt the okroshka to taste, season with rich sour cream. If desired, you can add a little hot mustard to the okroshka. Mix the ingredients.

5. Ready okroshka can be served immediately after cooking.

Bon appetit!

You may be interested in recipes for delicious soups:

Soup with canned fish and rice

Zucchini soup with rice and tomato


Mackerel pate

Mackerel is an excellent fatty fish that is suitable for preparing a huge number of dishes. Today I propose to make a very tasty and tender pate out of it. This snack turns out to be satisfying, nutritious and very healthy.

The pate is ideal for breakfast and quick snacks. It can be spread on pancakes, pita bread, toast, or served on a holiday table in waffle or shortbread tartlets. To prepare the pate we will use boiled mackerel; you can also bake the fish in the oven or steam it. The pate will sparkle with new colors if you use cold or hot smoked mackerel as the base. Carrots and sautéed onions add juiciness to the pate; boiled eggs make it even more satisfying and healthy.

The recipe is simple and quick, you can prepare it in 30 minutes. You can easily take this fish spread with you on a trip or on a picnic. The finished pate is best stored in a glass container with a hermetically sealed lid.

Ingredients for making mackerel pate:

Mackerel pate recipe

Step-by-step instruction:

1. Thaw the mackerel at room temperature, wash it, cut off the head and tail. Remove fins and entrails. Wash the fish carcass thoroughly and cut it into portions. Transfer the mackerel to a ladle or small saucepan. Add bay leaf, black allspice and coriander seeds for flavor.

2. Wash the carrots, peel them, cut them into half rings 1 cm thick. Add the carrots to the fish. Pour cold water over the ingredients, cover with a lid and bring to a boil. Boil the fish and carrots over low heat for 30 minutes.

3. Then carefully remove the pieces of mackerel and carrots from the broth and cool to room temperature. Remove skin and bones from the fish.

4. Peel the onions and cut them into small cubes. Place the vegetables in a frying pan with heated vegetable oil.

5. Stirring occasionally, sauté the onions over medium heat until golden brown.

6. Boil chicken eggs hard, cool in cold water, peel them, cut into 4 parts. In a blender bowl, mix mackerel fillets, carrots, sautéed onions and boiled eggs.

7. Add softened butter, salt and spices to taste.

8. Grind the ingredients at maximum blender speed, achieving a homogeneous consistency.

9. Transfer the finished mackerel pate into a glass container, seal it with a lid and store in the refrigerator. The snack is ready to eat immediately after preparation. Spread the pate on slices of fresh rye bread, garnish it with fresh herbs and serve.

Bon appetit!

Pay attention to another delicious pate recipe:

Sprat pate with hard cheese and sautéed vegetables


Delicate nut cake

This dessert is one of my top five favorite cakes. Quick preparation, a simple set of ingredients and amazing taste make this cake ideal. The dessert is light and very tasty. Airy sponge cakes with nut crumbs are ideally combined with delicate custard. The cake turns out very soft and just melts in your mouth.

I baked the cakes in the oven using 2 cooking rings with a diameter of 20–22 cm, covered with foil. It is convenient to use 2 identical baking dishes of suitable diameter for this purpose. If desired, the dough can be evenly distributed on a baking sheet lined with parchment and bake one rectangular cake, and then simply cut it in half.

Walnuts in the recipe can be replaced with peanuts, almonds or hazelnuts.

Ingredients for making a delicate nut cake:

Recipe for making a delicate nut cake

Step–by–step instruction:

1. To prepare the dough, mix chicken eggs and sugar in a deep bowl. Add a pinch of salt and vanilla.

2. At maximum mixer speed, beat the ingredients for 8–10 minutes until a fluffy and light mass is obtained. Pour refined vegetable oil and milk at room temperature into the resulting mixture.

3. Beat the ingredients at maximum mixer speed for 1–2 minutes, achieving a homogeneous mixture consistency. Mix wheat flour with baking powder. In 3 additions, add the flour mixture into the dough, each time mixing the ingredients until smooth at low mixer speed.

4. Grind the walnut kernels in a blender bowl into fine crumbs.

5. Add chopped nuts to the dough. Gently mix the ingredients with a silicone spatula using upward movements so that the dough does not fall.

6. Divide the dough evenly among 2 baking dishes with a diameter of 20–22 cm. Place the cakes in an oven preheated to 165 degrees and bake for 20–25 minutes until lightly golden brown. Cool the finished cakes on a wire rack to room temperature.

7. Meanwhile, prepare the cream. In a ladle or small saucepan, mix sugar, cornstarch, 2 chicken yolks and vanilla.

8. Constantly stirring the mixture, pour milk at room temperature into it in a thin stream. Place the ladle with cream on low heat. Stirring constantly, bring the cream to a boil, then remove it from the heat.

9. Immediately add butter and white chocolate to the hot cream. Stir the cream until the butter and chocolate are completely melted and the mass becomes homogeneous. Cover the cream with cling film and cool to room temperature.

10. Trim the cakes, cutting off the tops. Place one cake layer in a cooking ring. Spread half of the custard evenly on top.

11. Place the second cake layer on top of the cream. Distribute the remaining cream evenly on top. Grind the tops of the cakes in a blender bowl into coarse crumbs and distribute evenly over the cream.

12. Cover the cooking ring with the cake with cling film. Place the dessert in the refrigerator for at least 2 hours to allow the cake to infuse and soak.

13. Incredibly tender, airy nut cake, served with tea or coffee. If desired, the dessert can be decorated with walnut kernels.

Bon appetit!


Toast with avocado, pear and walnuts

This avocado toast recipe meets all the requirements for the perfect breakfast. It’s fast, simple, beautiful and very tasty! Choose ripe, soft avocado and juicy sweet pear – this is the key to the success of this dish.

Use your favorite type of bread to prepare the snack: wheat, rye, whole grain, multigrain, oatmeal. It can be yeasted, yeast-free or made with sourdough. Slices of bread can be dried in a toaster, oven, grill or dry frying pan. For the recipe I used aged Gouda, Parmesan or Pecorino would also work. Of the soft varieties, Gorgonzola, Brie or Roquefort will ideally highlight the taste of pear and avocado. Walnuts and honey add a spicy taste and beauty to the dish, fill the body with vitamins and make the snack more useful.

Make toast just before eating to keep the bread crisp and the avocados and pears from browning.

Ingredients for toast with avocado, pear and walnuts:

Recipe for toast with avocado, pear and walnuts

Step-by-step instruction:

1. Cut the bread into slices 1 cm thick. Dry the bread on the grill until golden brown. You can also fry it in a grill pan without oil, in a toaster or oven.

2. Spread a thin layer of cream cheese on the crusty bread.

3. Wash the avocado, cut it in half, remove the pit, peel the pulp. Cut the avocado into 5 mm thick slices and place them overlapping on toast.

4. Wash the pear, cut it in half, remove the core and seeds. Cut the fruit into thin slices and place on top of the avocado.

5. Using a vegetable peeler, cut the cheese into thin long slices and place it on toast. If desired, the cheese can be crumbled or chopped into shavings on a coarse grater.

6. Add walnut kernels. Drizzle liquid honey over toast. Decorate the appetizer with microgreens; I used sprouted radishes.

7. Serve ready-made avocado toast immediately after cooking for breakfast or as a snack. The combination of crispy fresh bread with tender avocado pulp and juicy pear makes this snack fantastically delicious.

Bon appetit!

I suggest trying a delicious snack for breakfast:

Sprat pate with hard cheese and sautéed vegetables


Puff pastry pie with canned tuna and eggs

This hearty puff pastry pie will surprise you with its original taste and ease of preparation. I think this is a great dinner idea. If you agree with me, follow the step-by-step instructions to easily prepare delicious and tender baked goods for the whole family. The combination of delicate crispy dough and juicy filling will not leave anyone indifferent.

We will use ready-made puff pastry as a base, which will significantly save time and ease effort. For the filling we will need canned fish in oil. Tuna, salmon, mackerel or sardines are best. You can boil the rice for the filling in advance or use what is left over from dinner. Agree, this is very convenient. All ingredients in the filling combine well with each other, making the taste of the pie delicate and harmonious.

Tuna puff pastry pie can be served either hot or chilled. It is convenient to take with you as a snack. Be sure to try it!

Ingredients for making puff pastry pie with canned tuna and eggs:

Recipe for puff pastry pie with canned tuna and eggs

Step-by-step instruction:

1. Take the puff pastry dough out of the refrigerator in advance so that it defrosts and becomes elastic. Wash the rice thoroughly under running water and boil until tender in salted water. Place the rice in a sieve and cool to room temperature.

2. Transfer the rice into a deep bowl. Open a can of canned tuna. Take the fish fillet out of the oil, mash it with a fork and add it to the rice. Wash the green onions, dill and parsley, dry off excess moisture, chop finely and add to the filling.

3. Boil two chicken eggs hard, cool in cold water, peel, cut into small cubes and add to the rest of the ingredients. To make the filling juicy, add 1-2 tablespoons of mayonnaise. If desired, the sauce can be replaced with full-fat sour cream or natural yogurt. Salt the ingredients to taste, season with ground spices for flavor. Mix the filling until smooth.

4. Roll out the puff pastry into a layer 5 mm thick. Cut out a circle with a diameter of 30 cm. Grease a heat-resistant baking dish with a diameter of 24 cm with butter. I used a silicone baking pan so I skipped this step. Transfer the dough to the prepared pan, forming sides for the pie. Prick the puff pastry with a fork to prevent it from deforming during baking.

5. Evenly distribute the filling of canned tuna, rice and eggs over the dough.

6. To make the pie juicy, distribute small pieces of butter evenly over the filling.

7. Cut out thin strips from the remaining dough. Place them on top of the filling, forming a decorative lattice to decorate the pie. To make the baked goods appetizing, brush the dough with beaten egg.

8. Place the puff pastry fish pie in an oven preheated to 180 degrees for 25-30 minutes. The exact cooking time depends on your oven.

9. When the pie is browned, carefully remove it from the oven, cool slightly on a wire rack and carefully transfer it to a plate of suitable diameter.

10. Cut the layer cake into portions and serve.

Bon appetit!

I offer another delicious pie recipe:

Puff pastry pie with sausage, tomatoes and onions


Hohop – chicken with onions and pomegranate

Oriental dishes have a unique taste and aroma. I suggest you diversify your chicken menu and prepare a truly amazing dish by adding caramelized onions and pomegranate seeds to the meat. Today on the menu is a very tasty dish of Armenian cuisine – hohop. Despite the simplicity of preparation, it is very tasty and aromatic. Chicken stewed with onions turns out incredibly juicy and tender. The meat breaks down into fibers and simply melts in your mouth. Pomegranate seeds add a slight sourness to the sauce and go well with the delicate taste of butter. This dish can be prepared both for a festive table and for an everyday lunch.

Any part of chicken is suitable for making hohop: wings, drumsticks or thighs. Serve the finished aromatic hohop as a main dish, garnishing it with parsley or cilantro. When stewed, you get a very tasty sauce into which you can dip crispy white bread or pita bread. If desired, the stewed chicken can be supplemented with a side dish of mashed potatoes.

Be sure to try this recipe. It is simple, affordable, but very tasty and original!

Ingredients for making hohop:

Hohop recipe

Step-by-step instruction:

1. Wash the chicken drumsticks and dry them from excess moisture with paper napkins. Rub the chicken pieces with a mixture of salt and spices on all sides. If you have some free time, leave the meat at room temperature for 30 minutes to marinate and absorb the flavors of the spices.

2. Place chicken drumsticks in a frying pan with heated vegetable oil. Fry the chicken pieces over medium heat until golden brown on all sides. Transfer the fried meat to a separate bowl. Cover the chicken with a lid to keep it warm.

3. Peel the onions and cut them into half rings 3-4 mm thick. Place the chopped vegetables in the pan in which the chicken was fried.

4. Stirring occasionally, sauté the onions over medium heat until golden brown.

5. Clean the pomegranate. Add pomegranate seeds to caramelized onions.

6. Place fried chicken drumsticks on top.

7. Add butter, cut into small pieces, to the pan.

8. Cover the pan with a lid. Simmer the chicken drumsticks in the sauce over low heat for 20-25 minutes. Decorate the finished dish with parsley or cilantro.

9. Serve the hohop immediately after cooking, adding pomegranate seeds to the dish. A glass of red wine goes perfectly with juicy meat.

Bon appetit!

Check out this delicious chicken recipe:

Chicken in orange sauce


Cheesecakes made from puff pastry with cottage cheese and currants

Do you love cheesecakes, but don’t have time to knead the dough and wait for it to rise? Prepare a quick version of cheesecakes! All you need to do in advance is defrost the package of puff pastry without yeast. You can leave the dough on the refrigerator shelf overnight. Then in just 20 minutes you can prepare a delicious dessert for breakfast with a cup of coffee. While the oven is heating up, you will have time to prepare the filling. Everything is very simple, fast and tasty!

Crispy puff pastry goes well with delicate curd filling and sweet and sour currants. The cheesecakes turn out incredibly tender and flavorful. In addition to currants, you can add other fresh or frozen berries to the filling. You can also use dried fruits, canned peaches or pineapples.

Cottage cheese for the recipe can be used at any fat content, I used 9%. The amount of sugar can be adjusted to your taste, taking into account the sweetness of the berries or fruits in the filling. Appetizing sweet cheesecakes are perfect for family tea parties or entertaining guests. Follow the step-by-step recipe and you will succeed!

Ingredients for making puff pastry cheesecakes with cottage cheese and currants:

Recipe for making puff pastry cheesecakes with cottage cheese and currants

Step-by-step instruction:

1. Take the puff pastry without yeast out of the freezer in advance so that it defrosts and becomes elastic. If you want to make cheesecakes for breakfast, leave the dough on the refrigerator shelf overnight.

2. To prepare the filling, mix cottage cheese, sugar and vanillin in a deep bowl. Carefully separate the chicken white from the yolk and add it to the filling.

3. Blend the ingredients for the filling with an immersion blender, achieving a uniform consistency.

4. Roll out the defrosted puff pastry into a rectangular layer 3-4 mm thick. Cut the dough into rectangular pieces measuring 10×8 cm.

5. Form the edges of the products by pressing the dough with a fork. Make several punctures in the center of the dough with a fork so that the dough does not deform during baking.

6. Place a small amount of curd filling in the center of the blanks. Add black currant berries on top. Lubricate the edges of the products with the remaining chicken yolk. It is convenient to use a pastry brush for this purpose.

7. Place the products on a baking sheet covered with parchment paper, at a short distance from each other. Place the cheesecakes with cottage cheese and currants in an oven preheated to 190 degrees for 20-25 minutes.

8. Cool the finished products on a wire rack to room temperature, decorate with powdered sugar and serve with tea or coffee. From the specified amount of ingredients you get 8 delicious cheesecakes.

Bon appetit!

Try making flavored cookies:

Orange cookies with cracks


Marinated champignons: quick recipe

Marinated champignons according to this quick and simple recipe turn out much tastier than store-bought mushrooms. They are ideal as a cold appetizer with fried meat or baked chicken. Mushrooms can be added to various salads, used for filling tartlets or making canapés.

The taste of mushrooms can be diversified by changing the composition of spices and herbs for the marinade. Rosemary, thyme, oregano, ginger – all these spices can add a unique taste to the snack. When choosing champignons for pickling, try to choose fresh and young mushrooms that have a whole cap. Young champignons contain less water and retain their shape better after cooking.

Glass jars with airtight lids are best suited for storing pickled champignons. Glass does not interact with vinegar and does not change the taste of mushrooms. The finished snack can be stored in the refrigerator for 7-10 days.

Ingredients for making marinated champignons:

Recipe for marinated champignons

Step-by-step instruction:

1. Wash the champignons, clean the mushroom caps. Cut off the dirty base at the legs. For pickling we will use fresh, intact small mushrooms.

2. Peel the onions and cut them into half rings. Wash the carrots, peel them, cut them into half rings using a curly knife. Peel the garlic cloves and cut into thin slices.

3. Pour salt, sugar and spices into a deep frying pan. Add sprigs of dill and parsley.

4. Pour water, apple cider vinegar and refined vegetable oil into the pan.

5. To make the marinated champignons fragrant, add onions, garlic and carrots. Stirring until the dry ingredients are completely dissolved, bring the marinade to a boil.

6. Place the prepared champignons into the boiling marinade. Cover the pan with a lid and simmer the mushrooms in the marinade over low heat for 10 minutes.

7. During this time, the mushrooms will decrease in size and release liquid. Turn off the heat and leave the champignons in the pan, covered, to cool to room temperature.

8. Transfer the cooled pickled champignons into a dry glass jar, pour in the marinade, close the lid and store in the refrigerator.

After 1 hour, the snack will be ready to eat.

Bon appetit!

Here’s another tasty mushroom appetizer:

Oyster mushrooms in batter


Salad “Mimosa Branch”

Delicious and very appetizing salad “Mimosa Branch” will create a sensation on the holiday table! Thanks to the unusual design in the form of a mimosa sprig, the dish looks elegant and original.

All the ingredients in it combine well with each other, making the taste of the salad delicate and harmonious. The classic trio of chicken fillet, fried champignons and hard cheese is perfectly complemented by pickled cucumbers and canned green peas. They make the dish juicy and spicy. The salad is easy to prepare, simple, and most importantly, it turns out very tasty and satisfying.

The dish can be served in a beautiful transparent salad bowl or decorated with a culinary ring. You can also use a springform baking pan of suitable diameter for this purpose. This way all layers of the salad will be visible, emphasizing the beauty of the finished dish.

Ingredients for making “Mimosa Branch” salad:

Recipe for “Mimosa Branch” salad:

Step-by-step instruction:

1. Wash fresh champignons and cut into small cubes. Place the mushrooms in a frying pan with heated vegetable oil. Stirring occasionally, fry the champignons over medium heat until golden brown. At the end of cooking, add dried Italian herbs, ground black pepper and salt to taste. Mix the ingredients and cool the mushrooms to room temperature.

2. Place a cooking ring with a diameter of 20 cm on a flat plate. Place the fried champignons in the first layer. Apply a mayonnaise mesh on top.

3. Peel the onions and cut them into small cubes. Place the vegetables in a frying pan with heated vegetable oil. Stirring occasionally, sauté the onions over medium heat until golden brown. Cool the vegetables to room temperature.

4. Place half of the sautéed onions on top of the mushroom layer.

5. Peel the pickled cucumbers and cut into small cubes. After squeezing out excess juice from the vegetables, place them on top of the onions. Lubricate the layer with a small amount of mayonnaise.

6. Wash the chicken fillet, remove fat and films. Boil the meat in a whole piece until tender in salted water with the addition of bay leaf and black allspice. Cool the chicken fillet in the broth to room temperature. Cut the meat into small cubes and place in a salad bowl. Add ground black pepper to taste. Apply a mayonnaise mesh on top.

7. Place the second half of the sautéed onion on top of the chicken fillet.

8. Grind the hard cheese on a grater with a large blade. Place grated cheese in a salad bowl on top of the remaining ingredients. Lubricate the layer with a small amount of mayonnaise.

9. Strain the canned green peas from the marinade and add to the salad. Apply a mayonnaise mesh on top.

10. Boil chicken eggs hard, cool in cold water, and peel them. Carefully separate the chicken whites from the yolks. Grind the boiled whites on a grater with a large blade. Place them on top of the canned peas. Add salt to taste. Lubricate the layer with a small amount of mayonnaise.

11. Now all that remains is to decorate the finished salad. Place sprigs of fresh dill on the layer of chicken whites. Sprinkle them with finely chopped boiled yolks, imitating a sprig of mimosa.

12. Cover the finished “Mimosa Branch” salad with cling film and place it in the refrigerator for 1-2 hours to soak. Before serving, carefully remove the cooking ring. Serve the salad to the festive table.

Bon appétit!

Another delicious salad for your consideration:

Radish salad with carrots and apple


Soup with canned fish and rice

We are preparing soup with canned fish and rice for lunch – a simple and budget-friendly dish for the whole family! A tasty and aromatic soup is especially good in the cool season; it warms you up and gives you energy.

This soup can be prepared not only at home, but also outdoors. You can take all the necessary ingredients with you on a hike or on a picnic. Fish soup cooked over a fire with a smoky aroma turns out incredibly tasty. For the recipe, you can use your favorite canned fish in oil. Mackerel, sardine or saury are perfect. I recommend using vegetable broth as a base, this makes the first dish much more flavorful. In addition to rice, you can add bulgur or millet to the soup.

Quick and easy to prepare, hearty and nutritious fish soup is sure to become your favorite. I definitely recommend trying this recipe!

Ingredients for making soup with canned fish and rice:

Recipe for soup with canned fish and rice

Step-by-step instruction:

1. Wash the potatoes, peel them, cut them into small cubes. Place vegetables in boiling vegetable broth. Cover the pan with a lid and cook the soup over low heat.

2. After 5 minutes, add thoroughly washed rice to the broth. Stir and continue to cook the soup over low heat with the lid on.

3. Peel the onions and cut them into small cubes. Wash the carrots, peel them, and chop them on a coarse grater. Place the vegetables in a frying pan with heated vegetable oil.

4. Stirring occasionally, saute the onions and carrots over medium heat until lightly golden brown.

5. When the potatoes and rice are almost ready, add sauteed vegetables to the soup.

6. Carefully open the can of canned fish. Remove the fish pieces from the oil, remove the backbone and large bones. Place canned sardines into the soup. Mix.

7. Add finely chopped dill and parsley, bay leaf and black allspice to the soup for flavor. Salt to taste, add ground spices. Mix the soup with canned fish. Bring it to a boil again, boil for 1 minute and remove from heat.

8. Serve the finished fish soup with canned food with a slice of crispy fresh bread.

Bon appetit!

Also your favorite soup recipes:

Zucchini soup with rice and tomato

Broccoli, hard cheese and cream soup