Spicy salted herring at home

No feast is complete without fish dishes. If you have a few days before the holiday, prepare spicy salted herring at home. The preparation will take a minimum of free time, but the result will pleasantly surprise you. I am sure you will no longer want to buy ready-made fish in the supermarket.

Lightly salted herring according to this recipe turns out very tasty and aromatic, moderately salty, with a tender and elastic fillet. Spicy marinade with onions perfectly emphasizes the magnificent taste of the fish.

Ready spicy salted herring can be served as an independent snack with onions or used to prepare various sandwiches and salads. Using a step-by-step recipe with photos, you will learn how to cook very tasty spicy salted herring at home.

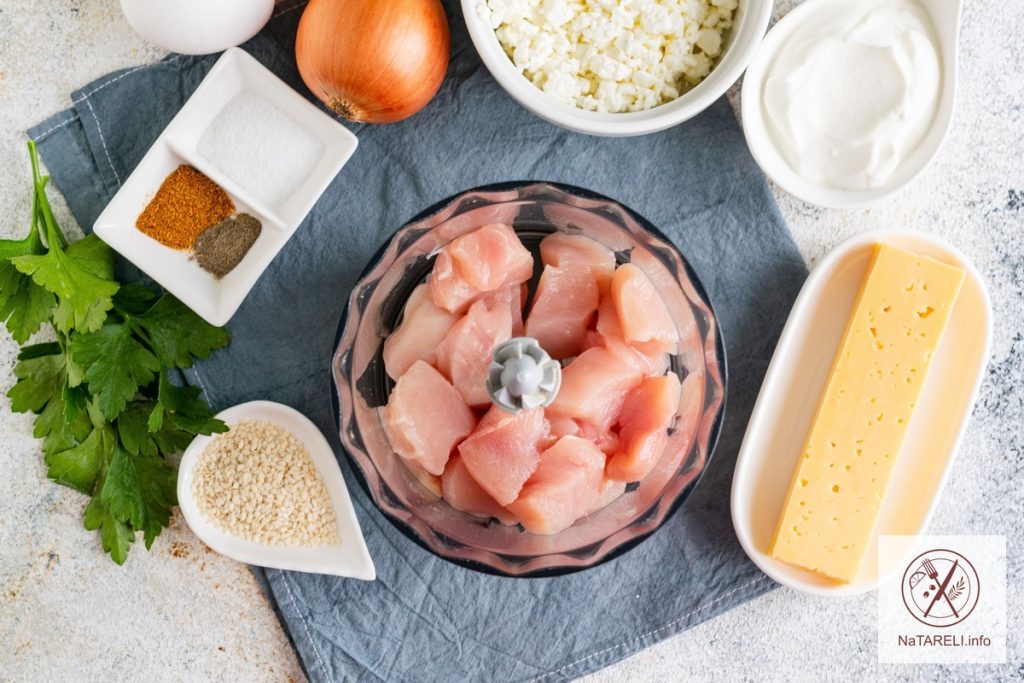
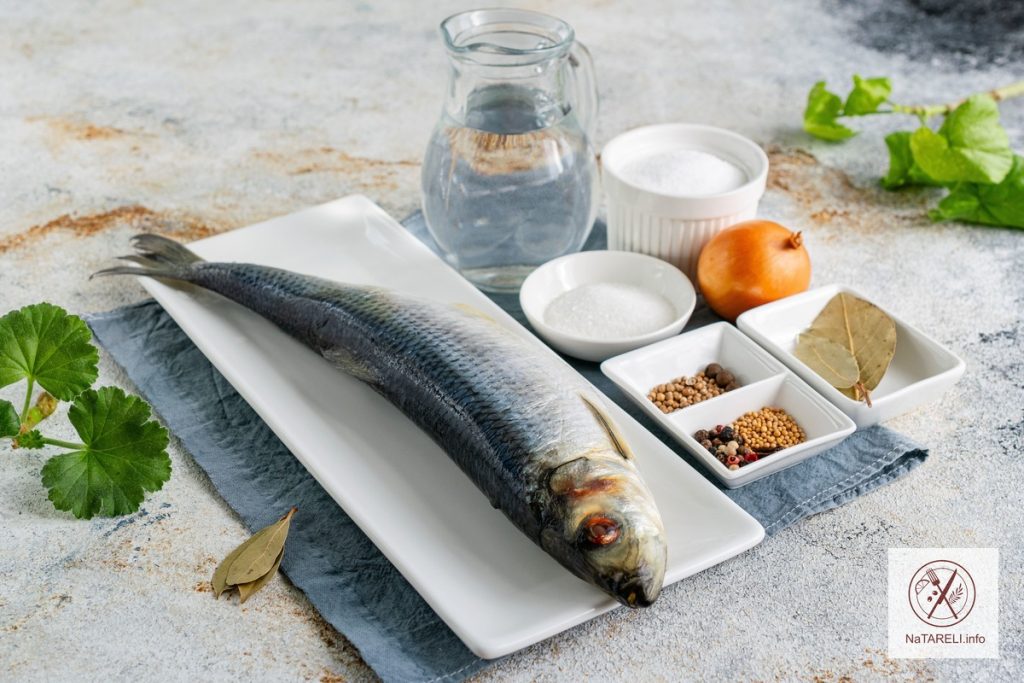
Ingredients for making spicy salted herring at home:

Recipe for making spicy salted herring at home

Step-by-step instructions:

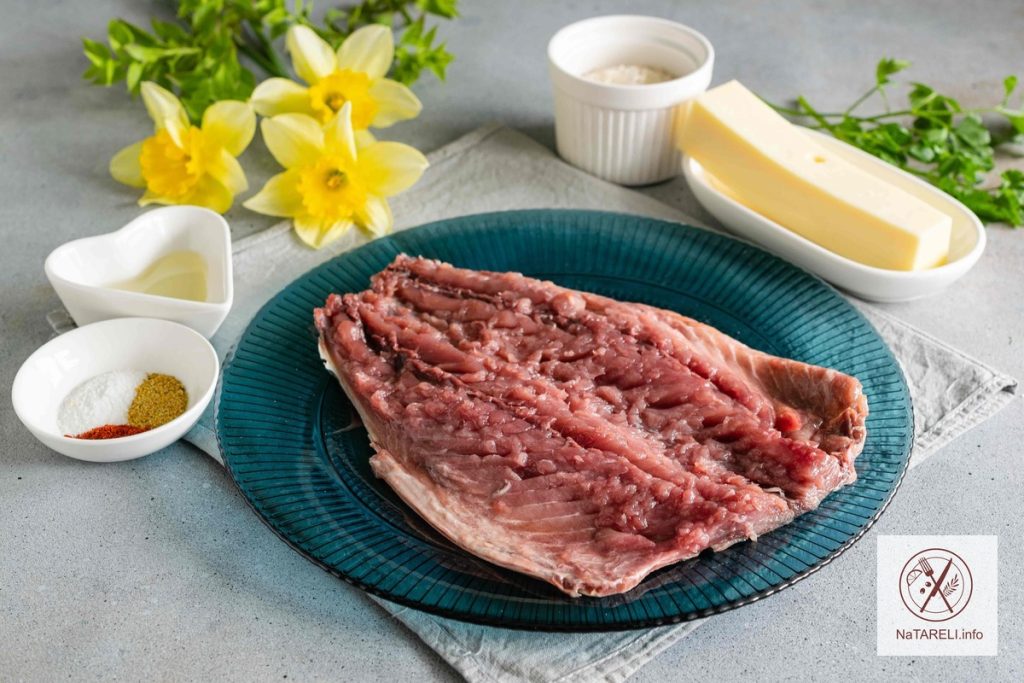
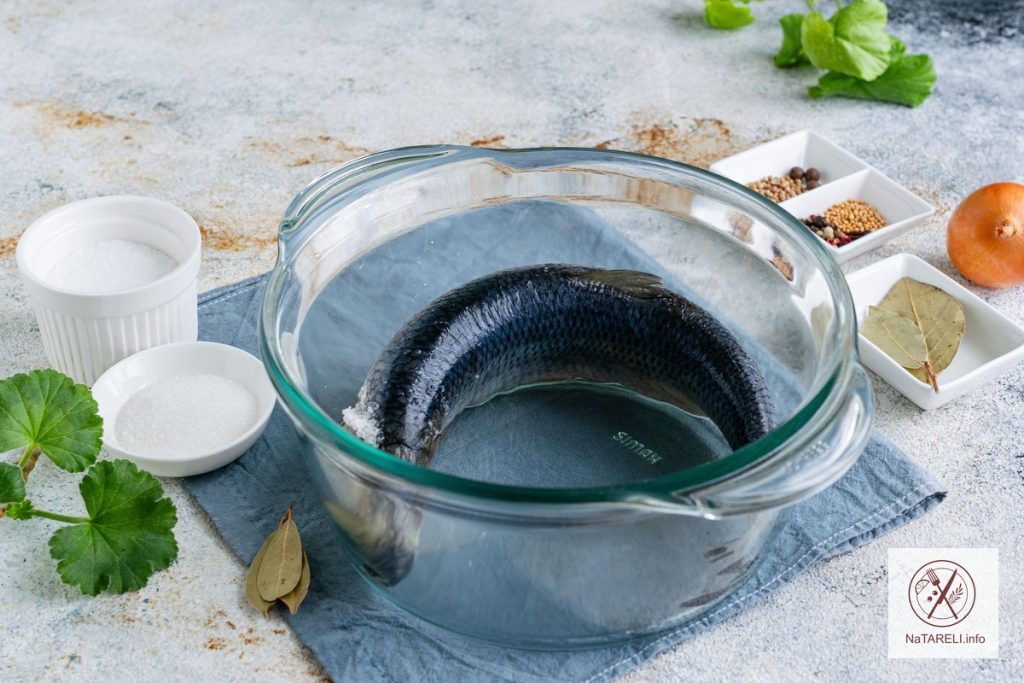
1. Defrost the herring in advance on the bottom shelf of the refrigerator. To prevent other products in the refrigerator from being saturated with the smell of fish, wrap the herring in a thick food bag. Thoroughly rinse the defrosted fish under running cold water. Remove the gills so they don’t give off bitterness. Add 1 tablespoon of salt from the total amount there so that all the insides are well salted.

2. Transfer the fish to a deep glass container.

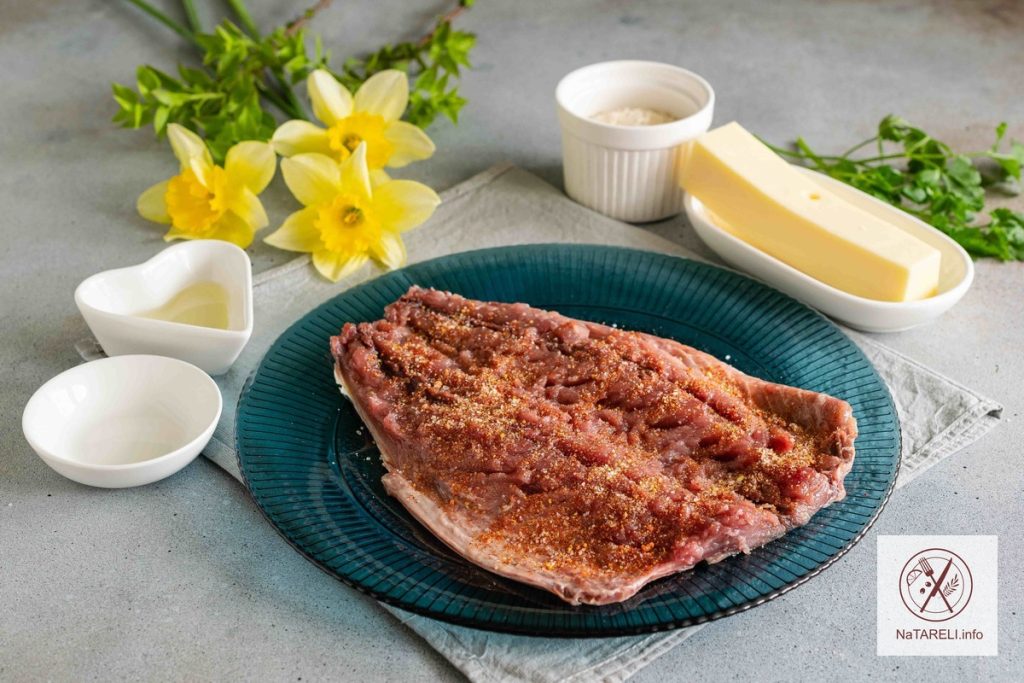
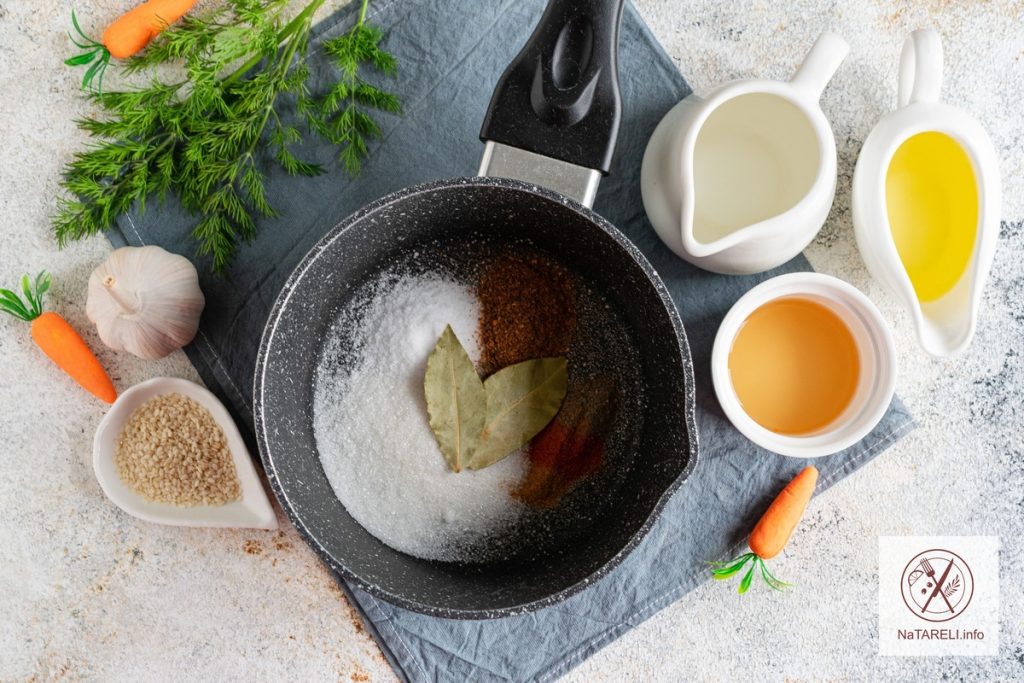
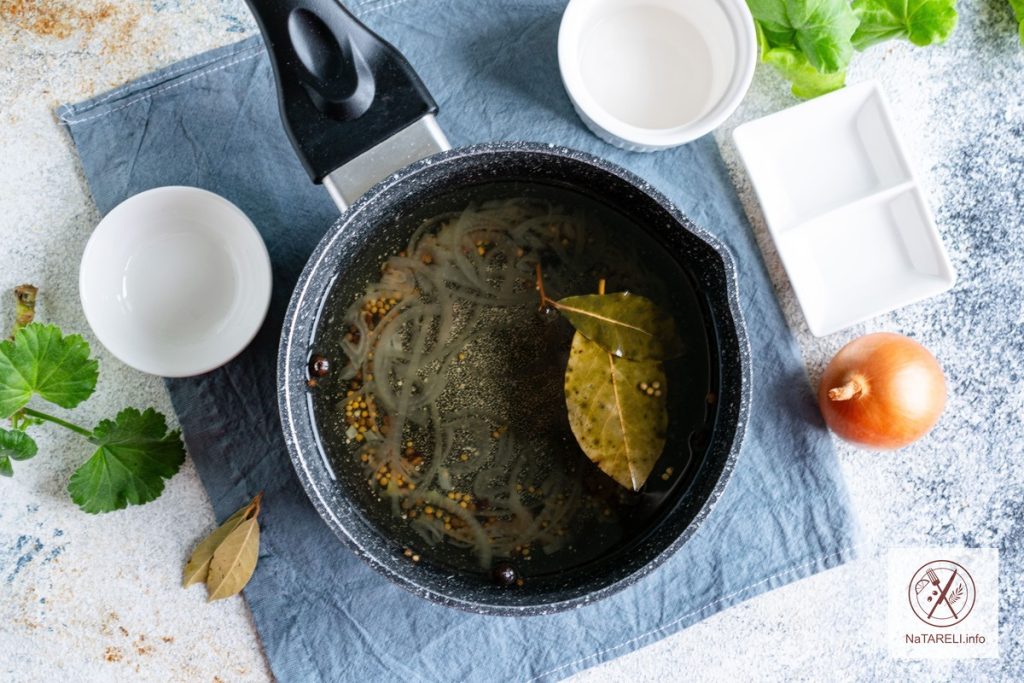
3. Prepare a spicy marinade. Peel the onion, cut into thin half rings, put in a ladle or small saucepan. Pour in the remaining salt and sugar. Add spices.

4. Pour 1 liter of cold water over the ingredients. Stirring until the sugar and salt are completely dissolved, bring the marinade to a boil. During the cooking process, the spices will reveal their aroma, giving the fish a piquant spicy note. Cool the finished marinade to room temperature.

5. Pour the cooled spicy marinade over the fish. Place a small saucer on top, it will act as a weight so that the herring is completely immersed in the marinade. Cover the dish with the fish with an airtight lid or cling film. Put the herring in the refrigerator to marinate for 3 days. After the specified time, fish will be lightly salted, on the 4th day – salted. Do not keep the herring in the brine for more than 4 days.

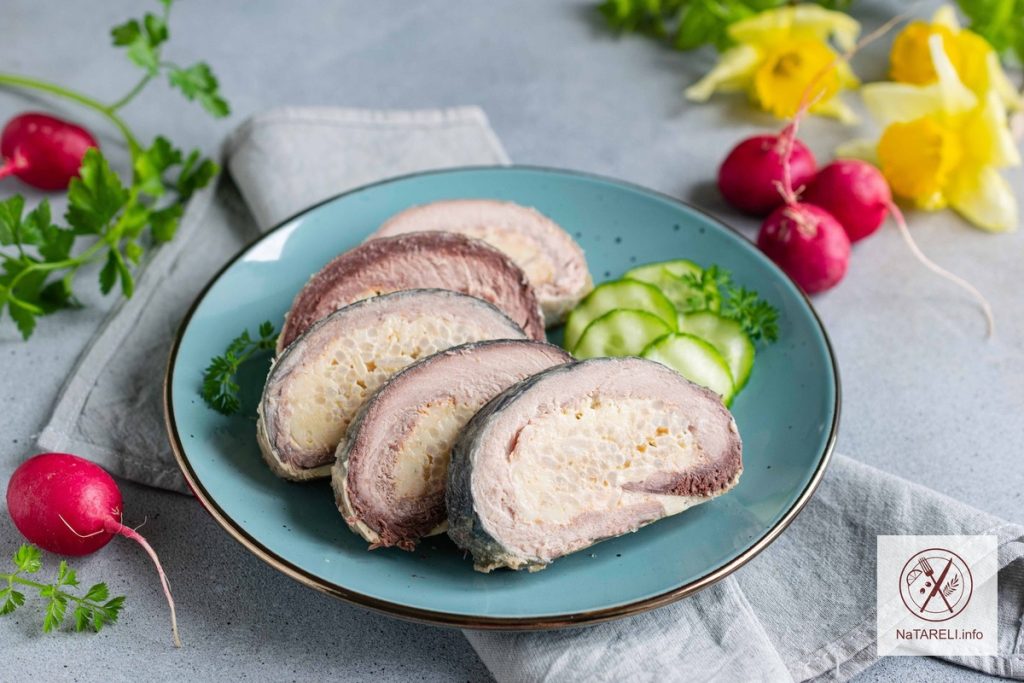
6. Remove the finished herring from the brine, cut off the head, tail and fins, remove the entrails. Clean the fish from skin and bones, cut into portions. Serve the spicy salted herring with dill and red onion. If desired, you can sprinkle the fish with vegetable oil.
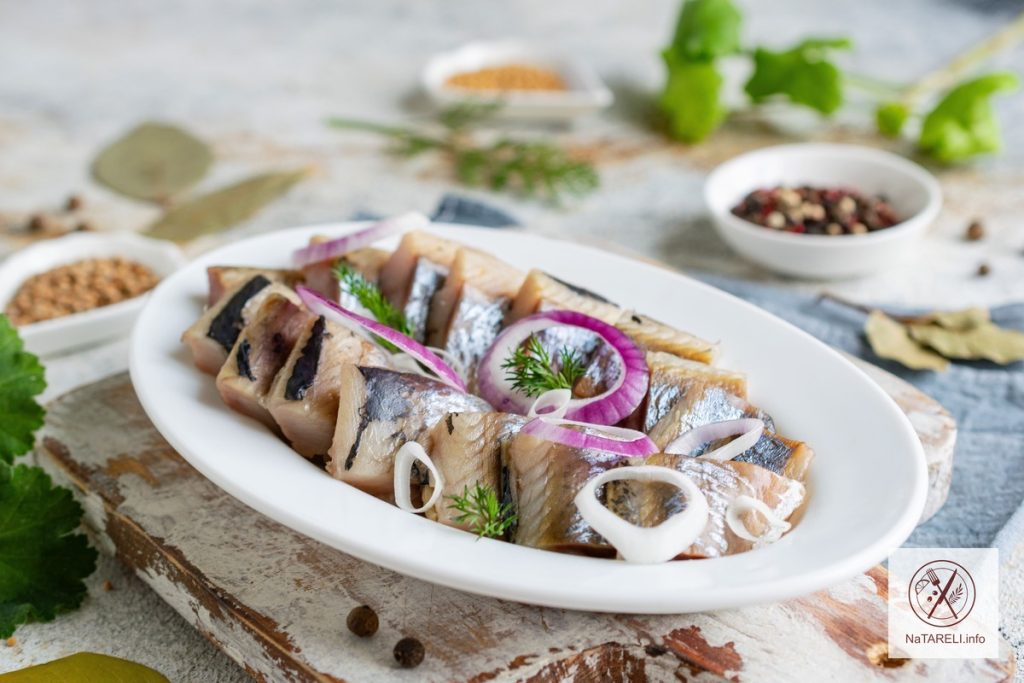
Bon appetit!

Try to cook:

Kefir pancakes with salmon and cream cheese

Baked mackerel roll with rice and hard cheese


Envelopes made of toast bread with sprats and pickled cucumbers

If you are planning a get-together with friends or a festive dinner, I recommend preparing a tasty and satisfying appetizer that will delight guests with its original taste, texture and appearance. Toast bread envelopes with sprats and pickled cucumbers turn out very appetizing, crispy on the outside and juicy on the inside.

We will use white toast bread as the basis for the envelopes. It is important that the bread is as fresh as possible, then it will be easy to roll it into envelopes. Then bake the bread slices in the oven until golden brown to give the snack a crispy texture. Next, all that remains is to fill the bread envelopes with the cheese and egg mixture and decorate the appetizer with sprats and pickled cucumbers.

Advice! Small sprats are ideal for this appetizer. Small fish will look neat in envelopes. Be sure to try this recipe, it will become a real decoration for your table.

Ingredients for preparing envelopes of toast bread with sprats and pickled cucumbers:

Recipe for making envelopes of toast bread with sprats and pickled cucumbers

Step-by-step instruction:

1. Roll out the slices of bread thinly with a rolling pin. Please note that the toast must be fresh, otherwise the bread will crumble.

2. Cut each slice of bread in half diagonally to form triangles.

3. Fold opposite corners of the bread to form “envelopes”. Secure the pieces with wooden toothpicks. Place the bread envelopes on a baking sheet or in a baking dish. Place the pieces in an oven preheated to 180 degrees for 10 minutes so that the products brown and become crispy.

4. Boil chicken eggs hard-boiled, cool in cold water, peel, and grate on a coarse grater. Grind the processed cheese in the same way and add it to the boiled eggs. For the recipe, processed cheese can be replaced with hard or creamy cheese, in any case it will turn out delicious.

5. Add a clove of garlic passed through a press, salt and ground black pepper to taste to the resulting mixture. Season the mixture with a small amount of mayonnaise. If desired, mayonnaise can be replaced with sour cream or homemade sauce.

6. Mix the ingredients until smooth.

7. Carefully remove toothpicks from the oven-dried bread envelopes. Fill the dough with the cheese and egg mixture.

8. In each envelope we insert one canned fish.

9. Add slices of pickled cucumber to the snack envelopes.

10. Decorate the appetizer with fresh dill.

11. Ready-made envelopes of toast bread with sprats and pickled cucumbers can be served immediately after cooking. Before guests arrive, the prepared snack can be kept in the refrigerator for 1-2 hours. The bread is well dried so it will remain crispy.

Bon appetit!

Try cooking:

Toasts with sprats


Snack triangles of lavash with minced meat and hard cheese

Lavash is a versatile product made from unleavened dough, from which you can prepare many delicious and simple dishes, from rolls to lasagna or Napoleon cake. Today I propose to prepare snack triangles of pita bread stuffed with minced chicken and hard cheese, fried in batter in a frying pan. The finished dish turns out very juicy, satisfying and aromatic. Snack triangles taste like pasties; they are convenient to take with you on the road or on a picnic.

The recipe is simple and quick; preparation does not require much time or special culinary skills. If desired, the filling can be varied using boiled meat, sausages, sautéed vegetables, fried or pickled mushrooms, different types of cheese and herbs.

An appetizing snack of crispy lavash with a juicy filling instantly disappears from the table. If you like experiments, delicious and easy to prepare dishes, be sure to save this recipe!

Ingredients for preparing snack triangles of pita bread with minced meat and hard cheese:

Recipe for making snack triangles of pita bread with minced meat and hard cheese

Step-by-step instruction:

1. Wash the chicken fillet and dry it from excess moisture with paper napkins. Trim the meat from fat and films, cut into medium-sized pieces, and transfer to a blender bowl. Peel the onion and garlic clove, wash it, cut it into several pieces and add to the chicken fillet. Add parsley, salt and ground spices to taste to the blender bowl.

2. Grind the ingredients into homogeneous thick minced meat, transfer it to a deep bowl. Grind the hard cheese on a coarse grater and add to the minced chicken. Mix the filling until smooth.

3. Prepare batter for snack triangles made from pita bread. In a deep bowl, combine 2 chicken eggs and sour cream. Mix the ingredients with a whisk until smooth.

4. Add sifted wheat flour and 0.5 teaspoon of salt to the batter. Mix the ingredients until smooth.

5. Cut the round pita bread in half. Evenly distribute the minced chicken filling with hard cheese around the entire perimeter of the lavash.

6. Fold the lavash with filling twice, forming a triangle. This is how we form all products.

7. Dip the lavash triangles into the batter so that the products are completely covered with it.

8. Place the appetizer in a frying pan with heated vegetable oil.

9. Fry the lavash triangles in batter over medium heat until golden brown on both sides.

10. Place the finished appetizer on a plate lined with paper napkins to remove excess oil. Serve juicy and delicious lavash triangles hot. An excellent addition would be fresh vegetables, sour cream sauce with herbs or spicy ketchup.

Bon appetit!

Check out these other delicious recipes:

Lavash roll with chicken and cottage cheese in the oven

Kefir pancakes with salmon and cream cheese


Baked mackerel roll with rice and hard cheese

Let’s prepare an original mackerel dish. This fatty and oily fish with few bones is perfect for making a delicious meatloaf. Mackerel fillet stuffed with boiled rice, eggs and hard cheese is rolled into a roll and baked in foil. The result is a very juicy and tender roll. It is perfect for the holiday table and for the everyday menu.

Fish roll can be served as a cold appetizer or supplemented with a side dish of baked or boiled potatoes, crumbly rice or bulgur. The finished dish holds its shape well, is easily cut into portions and has a very appetizing cut. It turns out very elegant, festive and tasty.

Using this principle, you can prepare a mackerel roll with different fillings, using sautéed vegetables, fried mushrooms, pickled cucumbers, boiled eggs and various spices.

Ingredients for making baked mackerel roll with rice and hard cheese:

Recipe for baked mackerel roll with rice and hard cheese

Step-by-step instruction:

1. Wash the rice thoroughly, place it in a small saucepan and add 200 ml of cold water. After the water boils, add a pinch of salt and boil the cereal until tender for 15 minutes. Place the rice in a colander and cool to room temperature. Transfer the rice into a deep bowl, pour in soy sauce, add 1 chicken egg.

2. Mix the ingredients until smooth.

3. Defrost freshly frozen mackerel at room temperature, wash it, and dry it to remove excess moisture. Cut off the head, tail and fins. We remove the mackerel’s entrails, backbone and large bones. On a work surface, open the fish carcass, skin side down, like a book.

4. Salt the mackerel to taste, season with ground spices.

5. Grate the hard cheese on a grater with a large blade. Distribute the grated cheese evenly over the fish.

6. Place the filling of boiled rice with egg and soy sauce on top.

7. Roll the fish with the filling into a tight roll, moving from the tail to the head. Transfer the roll to a sheet of foil greased with vegetable oil.

8. Wrap the fish roll tightly in foil and transfer the workpiece to a baking dish. Place the fish roll in an oven preheated to 180 degrees for 25 minutes. Then turn off the heat and leave the roll in the oven for another 10 minutes. Cool the finished dish in foil to room temperature, then put it in the refrigerator overnight.

9. The next day, serve the baked mackerel roll with rice and hard cheese, cutting it into portions. An excellent addition would be fresh vegetables, mashed potatoes or rice.

Bon appetit!

Try to cook:

Yeast pie with mackerel “Fish”


Mushroom champignon sauce

Mushroom champignon sauce is universal because it can be served with any main course. It goes well with potatoes, pasta, and crumbly porridges. By changing the side dish and adding mushroom sauce, you get a new and tasty dish every time.

Champignon sauce with vegetables and sour cream is prepared very simply and quickly. Spices can be varied to suit your taste. Champignons can be replaced with wild mushrooms; chanterelles and porcini mushrooms are perfect.

The sauce is thick, rich, with a bright mushroom taste and aroma. Instead of water, you can use mushroom broth, preferably wild mushrooms. This sauce will be very flavorful!

Ingredients for making mushroom champignon sauce:

Recipe for making mushroom sauce from champignons

Step-by-step instruction:

1. Peel the onions and cut them into small cubes. Wash the carrots, peel them, and chop them on a fine grater. Place the vegetables in a frying pan with heated vegetable oil. If desired, you can add 30 g of butter to the vegetable oil for a creamy taste.

2. Stirring, sauté onions and carrots over medium heat for 5-7 minutes until soft.

3. Wash fresh champignons and cut into small cubes. Add chopped mushrooms to sautéed vegetables. Stir and continue frying the ingredients together for 5 minutes.

4. In a separate bowl, mix wheat flour and water until smooth. Instead of water, you can use vegetable or mushroom broth, this will make the sauce even tastier and more aromatic.

5. Pour the resulting mixture into the frying pan with vegetables and champignons. Mix the ingredients, add salt and spices to taste. Cover the pan with a lid and simmer the mushroom sauce over low heat for 15 minutes.

6. Then add rich sour cream to the mushroom sauce. Stir and continue to simmer the sauce under the lid over low heat for another 5 minutes.

7. At the end of cooking, add finely chopped dill and parsley.

8. Serve aromatic mushroom sauce made from champignons with your favorite side dish. This could be vegetable puree, rice, bulgur, buckwheat, egg noodles or spaghetti.

Bon appetit!

Pay attention to the recipe for delicious mushrooms:

Marinated champignons: quick recipe


Pickled daikon – a delicious oriental snack

Let’s prepare a very tasty, juicy and aromatic cold daikon appetizer. It goes well with meat and fish dishes. It will take 24 hours to marinate this healthy root vegetable. Ready marinated daikon can be stored in the refrigerator for 2 weeks. The snack does not lose its taste and remains juicy and piquant thanks to turmeric. This Asian spice gives daikon an appetizing golden hue and has antibacterial properties.

Daikon for pickling can be cut into thin slices using a special shredder or a curly knife. If desired, vinegar can be replaced with lemon juice. It is not as strong as vinegar, so add a little more, 70 ml will be enough.

Don’t be afraid to experiment with spices. Additionally, you can add star anise, saffron and clove buds to the marinade. If you want to make the appetizer spicy, add a few chili peppers.

Ingredients for making pickled daikon:

Pickled daikon recipe

Step-by-step instruction:

1. First, prepare the marinade, as it must cool to room temperature. In a ladle, mix sugar, salt and ground turmeric. The amount of sugar can be adjusted at your discretion – from 3 to 5 tablespoons. I added 3 tablespoons of sugar, I got a sweet and sour marinade. Accordingly, the daikon turned out to be sour. If you like it sweeter, add more sugar. Pour all the spices into the mixture, pour in 500 ml of purified water. Stirring until the sugar and salt are completely dissolved, bring the marinade to a boil. Remove the ladle with the marinade to a cool place and cool it to room temperature.

2. Wash the daikon, cut off the tails, and peel them. Cut the vegetables into thin rings. You can also cut daikon into thin long strips using a vegetable peeler. The thinner the slice, the faster the vegetables will marinate. Peel the garlic cloves and cut into thin slices.

3. Place daikon slices in a glass jar, alternating them with garlic slices.

4. Pour the marinade that has cooled to room temperature over the ingredients. It should completely cover the vegetables.

5. Close the jar hermetically with a lid. Place the daikon in the refrigerator for 1 day. During this time, the root vegetable will marinate well, be filled with the aroma of spices and acquire a yellow tint.

6. After 24 hours, the pickled daikon will be ready. Serve it as a cold appetizer with baked chicken, shish kebab, and grilled fish.

Bon appetit!

Try other recipes for delicious snacks:

Korean carrots

Pickled cabbage “Provencal”


Liver muffins

The liver is considered a storehouse of nutrients. There is practically no fat in it, and in terms of protein volume it is in no way inferior to chicken breast. In many countries, liver is considered a delicacy and is regularly included in your diet. I suggest making delicious and healthy snack muffins from offal. For the recipe I used chicken liver, it is more tender.

Thanks to vegetables, liver muffins turn out very juicy and aromatic. Baking in portioned molds gives the appetizer an appetizing appearance and simplifies serving. Muffins taste like liver cutlets, but they are more tender and have less calories. They will not harm your figure; for the dough, instead of wheat flour, we will use oatmeal. In my opinion, this is a versatile snack. It will diversify the daily menu and will decorate the holiday table. Liver muffins are best served hot. They go well with any side dish. A great addition would be cranberry or any other sweet and sour sauce.

Be sure to try this recipe. Even those who don’t like offal will like these muffins.

Ingredients for making liver muffins:

Recipe for liver muffins

Step-by-step instruction:

1. Wash the chicken liver and dry it from excess moisture with paper napkins. Remove the veins from the by-products, cut them into several pieces and place them in a blender bowl. Wash the carrots, peel them, chop them coarsely, add them to the chicken liver. Peel the onions, cut them into several parts, and add them to the blender bowl. For flavor, add a peeled clove of garlic.

2. Using a blender, grind the ingredients until smooth. Add oatmeal, baking powder, salt and ground spices to the resulting mixture. Beat in 1 chicken egg.

3. Grind the ingredients again until smooth using a blender. Place the dough for liver muffins into individual silicone molds, filling them 2/3 full.

4. Grind the hard cheese on a grater with a large blade. Distribute the grated cheese over the liver mass.

5. Place the liver muffins in an oven preheated to 180 degrees for 30 minutes. During the cooking process, the products will increase in volume and turn out very tender and airy. When the grated cheese on top has melted and browned, carefully remove the liver muffins from the oven. Cool them slightly on a wire rack, then carefully remove from the pan and serve warm.

Dietary chicken liver muffins can be complemented with your favorite side dish or fresh vegetable salad.

Bon appetit!

Try a delicious liver recipe: Chicken liver brawn with vegetables


Toasts with sprats

Preparing croutons with sprats. Such a simple but very tasty snack is universal. It is suitable for both breakfast and the holiday table. Toasts with sprats will be an excellent addition to an aperitif before the main course or a wonderful treat for a friendly meeting. The combination of crispy bread soaked in garlic, smoked sprats and hard cheese will not leave anyone indifferent.

You can use any type of bread for the recipe: wheat, rye or multigrain. It can be dried in a toaster or oven, or fried in a dry frying pan or on an electric grill. If desired, croutons can be supplemented with a slice of pickled cucumber or a slice of fresh tomato.

The recipe is very simple and quick, even a young cook can handle it. Prepare the necessary ingredients, follow the step-by-step recipe and enjoy a satisfying and crispy snack!

Ingredients for making croutons with sprats:

Recipe for making croutons with sprats

Step-by-step instruction:

1. Cut white bread into slices 1 cm thick. Place them on a baking sheet covered with parchment. Place the bread in an oven preheated to 180 degrees for 7-10 minutes. When the bread is browned, carefully remove it from the oven.

2. Rub each slice of loaf with a clove of garlic for flavor.

3. Grease the bread with a thin layer of mayonnaise.

4. Place a few sprats on top. The amount of fish can be adjusted to your liking.

5. Boil chicken eggs hard-boiled, cool in cold water, peel, and grate on a coarse grater. Place the grated eggs on top of the canned fish. Add salt and ground black pepper to taste.

6. Grind a piece of hard cheese on a coarse grater. Evenly distribute shavings of hard cheese over the croutons.

7. Decorate the appetizer with fresh herbs.

8. Serve delicious and crispy croutons immediately after cooking.

They are perfect for Sunday breakfast with the whole family.

Bon appetit!

Try cooking:

Toast with avocado, pear and walnuts


Korean carrots

Korean carrots are an all-season dish. In the warm season, it is a complete side dish for meat cooked on coals and a filling for appetizers in pita bread. In autumn and winter, spicy carrots become an indispensable ingredient in vitamin-rich salads.

It seems that not a single holiday is complete without it. The appetizer turns out to be very juicy, aromatic and moderately spicy. The amount of spices and garlic can be adjusted to your taste. Coriander gives the appetizer a characteristic nutty-spicy flavor, so don’t be lazy about purchasing this spice for the recipe. If you use coriander grains, you must first grind them in a mortar. Additional ingredients for Korean carrots are sugar and vinegar, which give the vegetables a subtle sweet and sour note.

In a hurry, healthy and tasty, bright and juicy Korean carrots according to this recipe turn out to be much tastier than store-bought ones!

Ingredients for cooking carrots in Korean:

Korean carrot recipe

Step-by-step instruction:

1. Wash the carrots, peel them. Grind the vegetables into long thin strips on a grater to prepare Korean carrots. Transfer the carrots to a deep bowl.

2. Prepare the marinade. In a ladle or small saucepan, mix salt, sugar and ground spices. Add bay leaves for flavor.

3. Pour in cold water, refined vegetable oil and 6% apple cider vinegar. Stirring constantly until the salt and sugar are completely dissolved, bring the marinade to a boil.

4. Pour hot marinade over the grated carrots and stir.

5. Add garlic cloves passed through a press to the appetizer.

6. Fry sesame seeds in a dry frying pan until golden brown.

7. Add sesame seeds to Korean carrots and mix.

8. Transfer the snack into a glass bowl and seal it with a lid. Place the Korean-style carrots in the refrigerator for 3-4 hours so that the vegetables are marinated and cooled.

Korean carrots can be served as a cold appetizer or used to make various salads or homemade hot dogs.

Bon appetit!

Pay attention to the recipes of delicious snacks:

Lavash roll with chicken and cottage cheese in the oven

Chicken liver brawn with vegetables


Lavash roll with chicken and cottage cheese in the oven

Prepare a delicious and satisfying lavash roll with chicken and cottage cheese in the oven for a family lunch. This is the perfect dish when you want homemade baked goods, but don’t want to fuss with dough. The recipe is simple and accessible to any housewife. A quick lavash roll is prepared in a matter of minutes, and the filling uses tender chicken fillet with cottage cheese and hard cheese. It’s impossible to tear yourself away!

A tasty, juicy and satisfying roll that is perfect for any table. You can take this dish with you to a picnic or serve it on a holiday table. The composition of the filling for the appetizer can be changed to suit your taste, using different types of meat and adding fresh herbs and your favorite spices.

For this recipe, it is better to use thin, fresh pita bread; it will be easy to roll. Chicken fillet can be replaced with dark meat from thighs or drumsticks, it is more juicy.

Ingredients for preparing lavash roll with chicken and cottage cheese in the oven:

Recipe for making lavash roll with chicken and cottage cheese in the oven

Step-by-step instruction:

1. Wash the chicken fillet, dry it from excess moisture with paper napkins, remove fat and films, and cut it into medium-sized pieces. Transfer the meat to a blender bowl and grind into homogeneous mince.

2. Transfer the minced chicken into a deep bowl. Peel the onions, cut into small cubes, and add to the minced chicken.

3. Grind the hard cheese on a coarse grater and add it to the filling.

4. Add cottage cheese to the resulting mixture. If you use coarse-grained cottage cheese, you can first grind it through a sieve. This will make the filling more tender.

5. Beat 2 chicken eggs into the filling. Add sour cream. For the recipe, I used sour cream with a fat content of 20%; if desired, it can be replaced with thick natural yogurt. Add salt and spices to taste.

6. Mix the filling thoroughly, achieving a uniform consistency.

7. Cut the pita bread into 3 rectangular sheets of the same size, mine are 32 by 26 cm. Divide the finished filling into 3 equal parts. Grease the lavash sheet with 1/3 of the prepared filling.

8. Repeat the same steps with the remaining two sheets of pita bread. Place the sheets of pita bread with filling on top of each other, as in the photo.

9. Carefully roll the workpiece into a tight roll. Transfer the roll to a baking sheet lined with parchment paper. Beat the remaining chicken egg with a fork until the white and yolk combine. Brush the roll with beaten egg and decorate with sesame seeds.

10. Place the snack roll in an oven preheated to 180 degrees for 40-45 minutes. When the product is browned, carefully remove it from the oven.

11. Let the finished dish cool slightly. Cut the lavash roll with chicken and cottage cheese into portioned pieces and serve. The roll is very tasty both hot and chilled.

Bon appetit!

Try these other delicious snack recipes:

Toast with avocado, pear and walnuts

Chicken liver brawn with vegetables