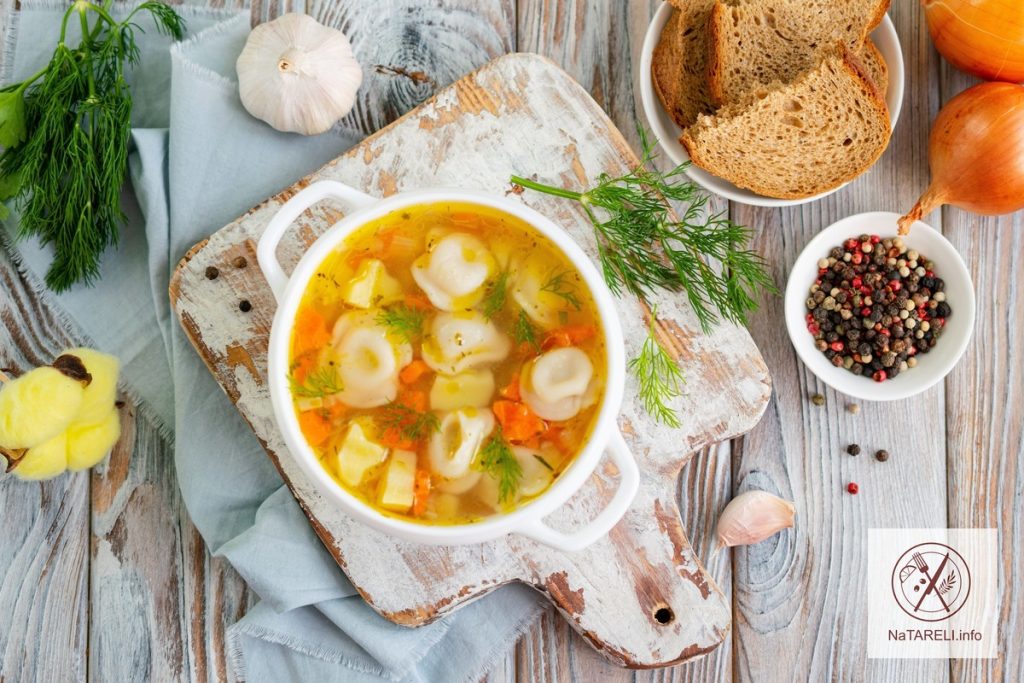
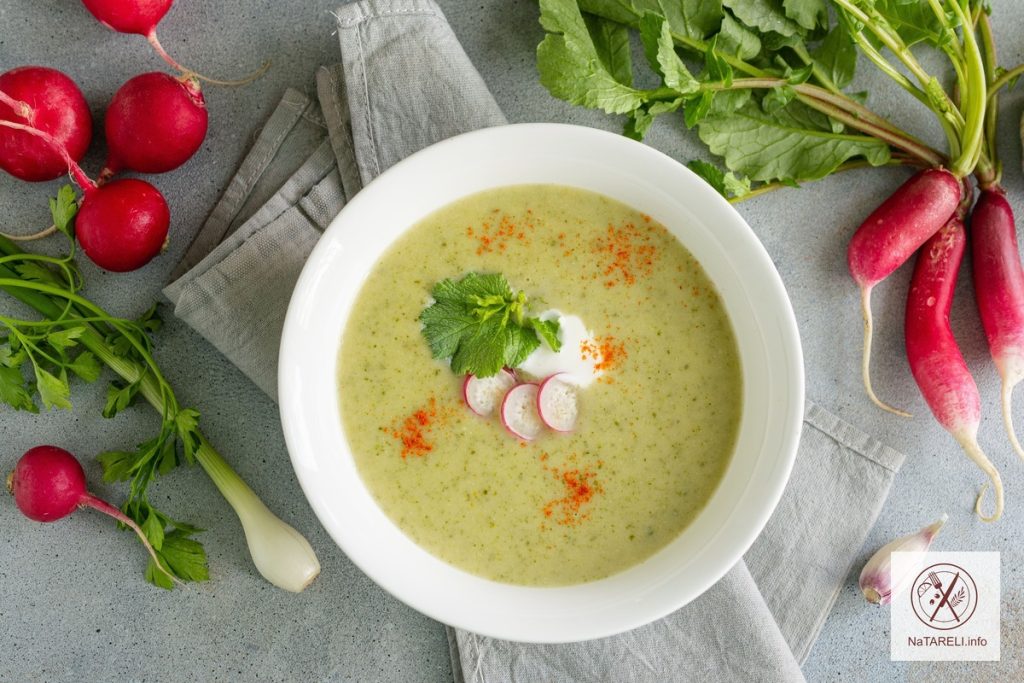
Creamy soup with radish tops

Сьогодні в меню вершковий суп із бадилля редису. Навесні часто можна придбати пучок редиски разом із бадиллям. Мало хто знає, що для приготування різних страв можна використовувати не лише коренеплоди, а й бадилля. Це поживна зелень, яка на смак схожа на мангольд і відноситься до того ж сімейства капусти, що і броколі. Листя редису багаті на вітаміни С, К, А і відмінно підходять для приготування різних супів, салатів і соусів.

Суп за цим рецептом виходить дуже смачним та ароматним, з приємною кремоподібною текстурою. Зелень редису надає страві оригінальної пікантної нотки. Якщо ви хочете внести різноманітність у повсякденне меню та приготувати легкий, але при цьому корисний та поживний суп, цей рецепт прийде вам на допомогу.

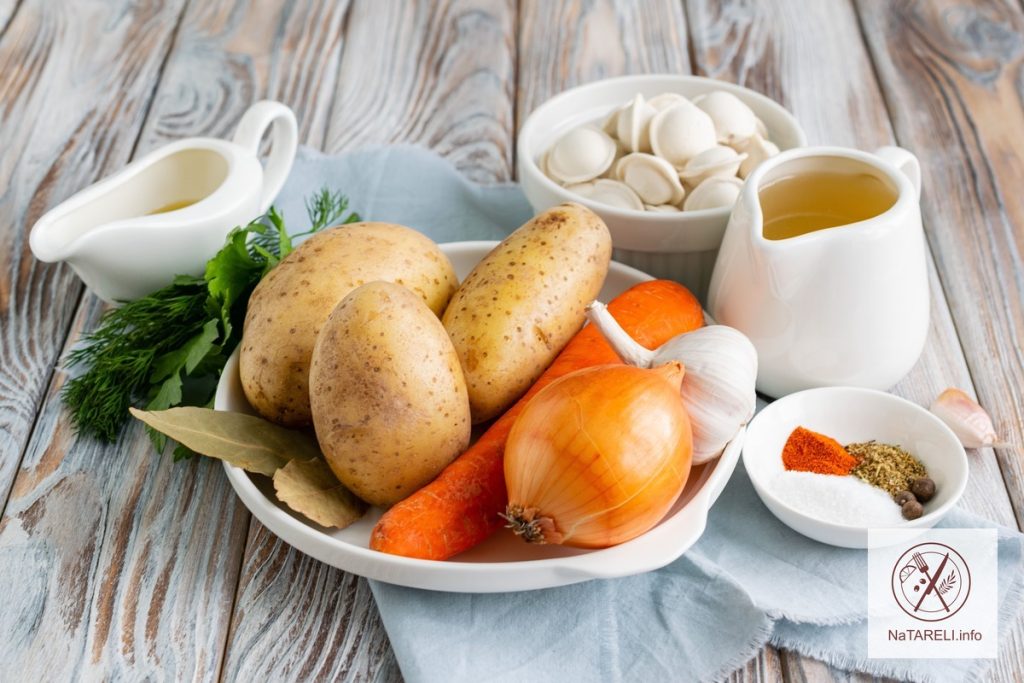
Як основу для супу використовуватимемо курячий бульйон. Щоб надати бульйону красивого золотистого відтінку, додайте у воду шматочок моркви і ретельно помиту цибулину в лушпині. Для аромату додайте в бульйон стебла кропу та петрушки, корінь селери та пастернаку.

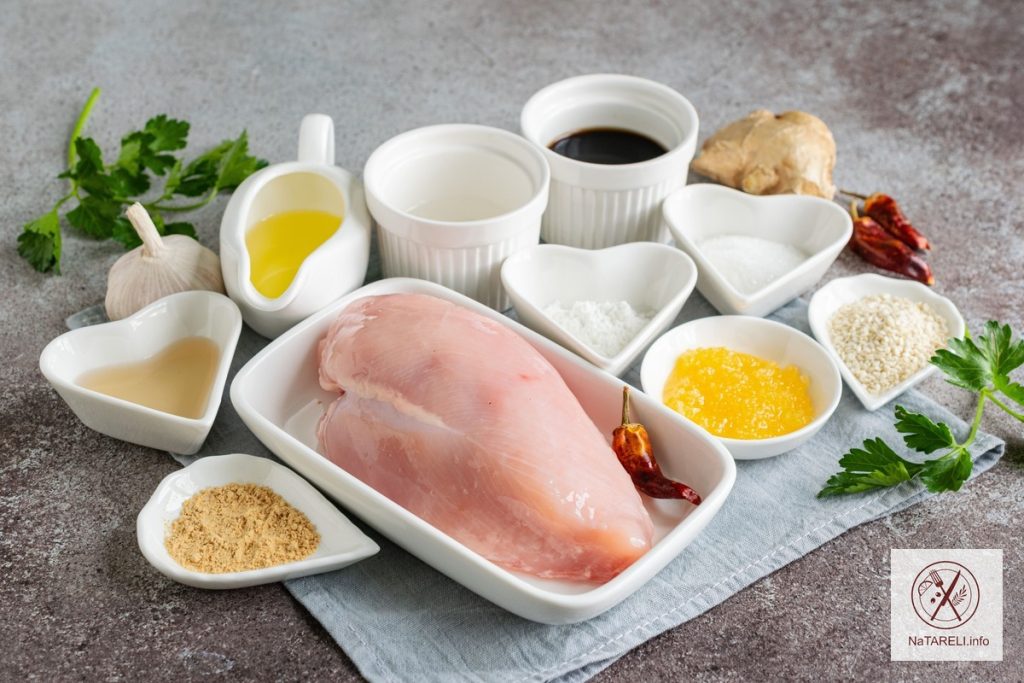
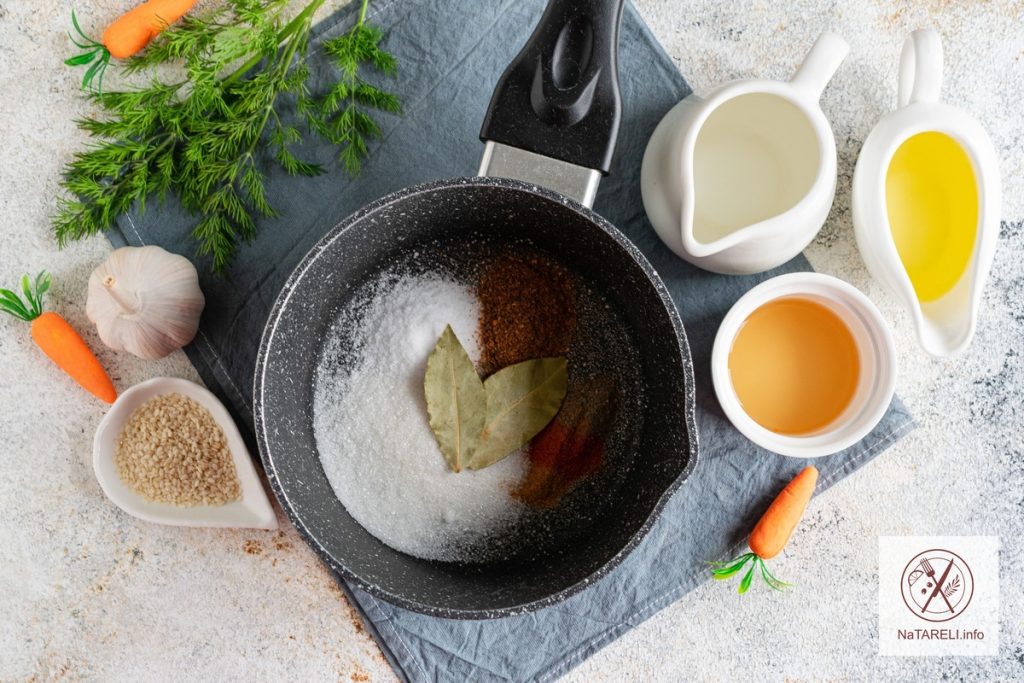
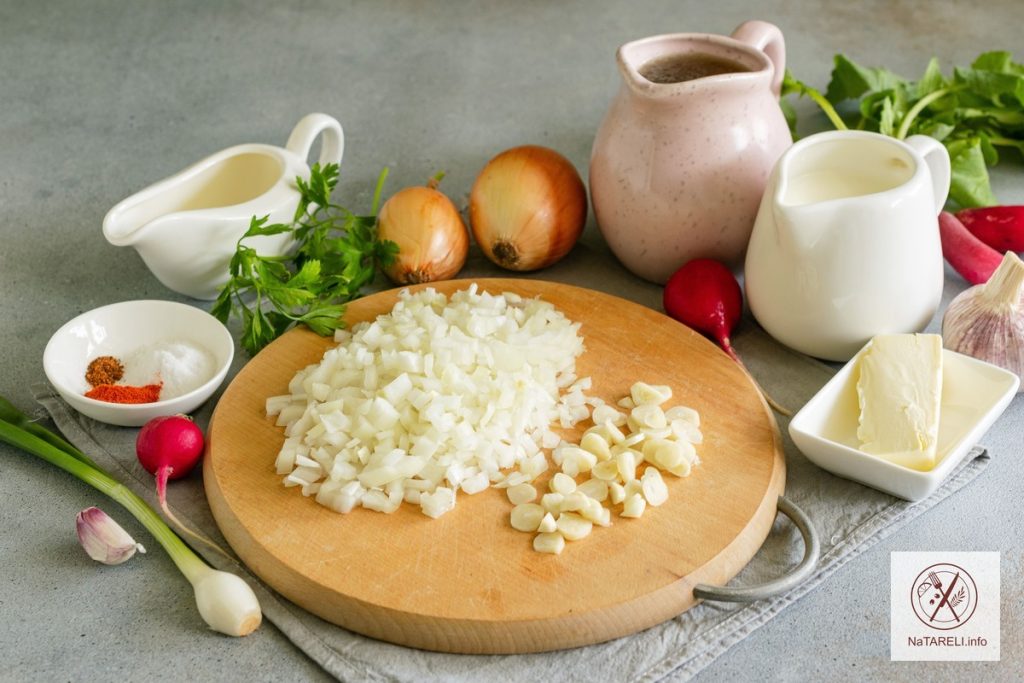
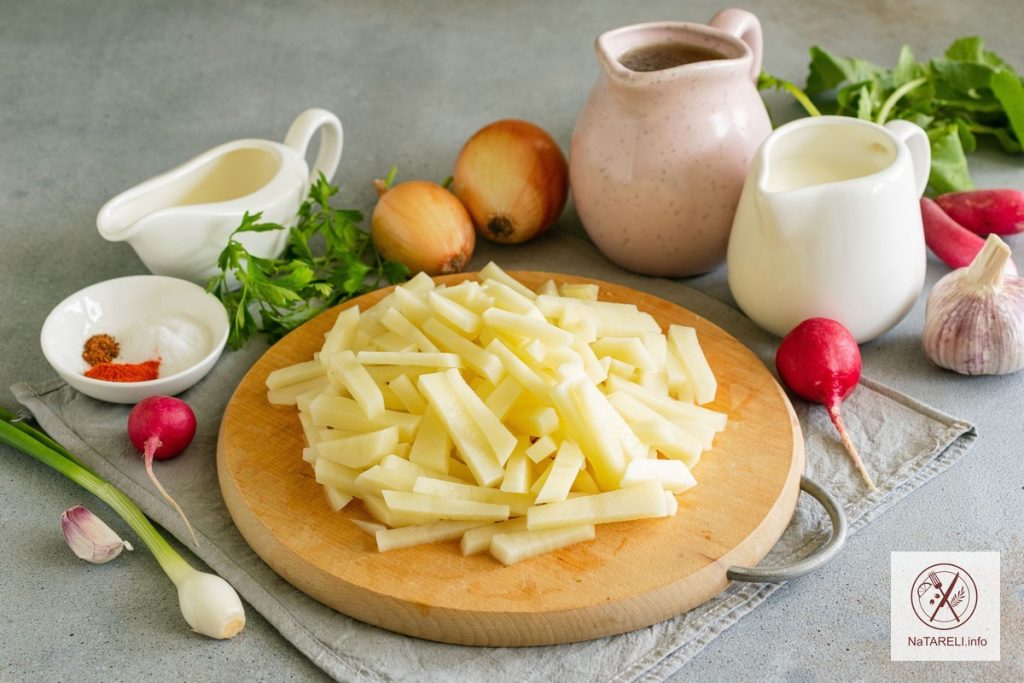
Інгредієнти для приготування вершкового супу з бадиллям редису:

Рецепт приготування вершкового супу з бадиллям редису

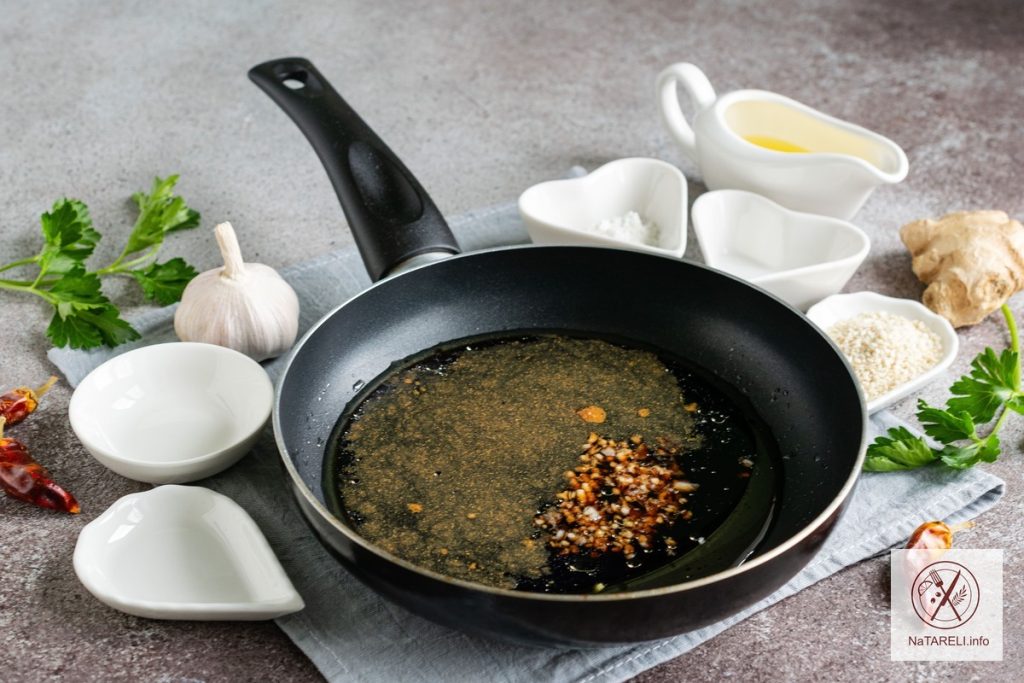
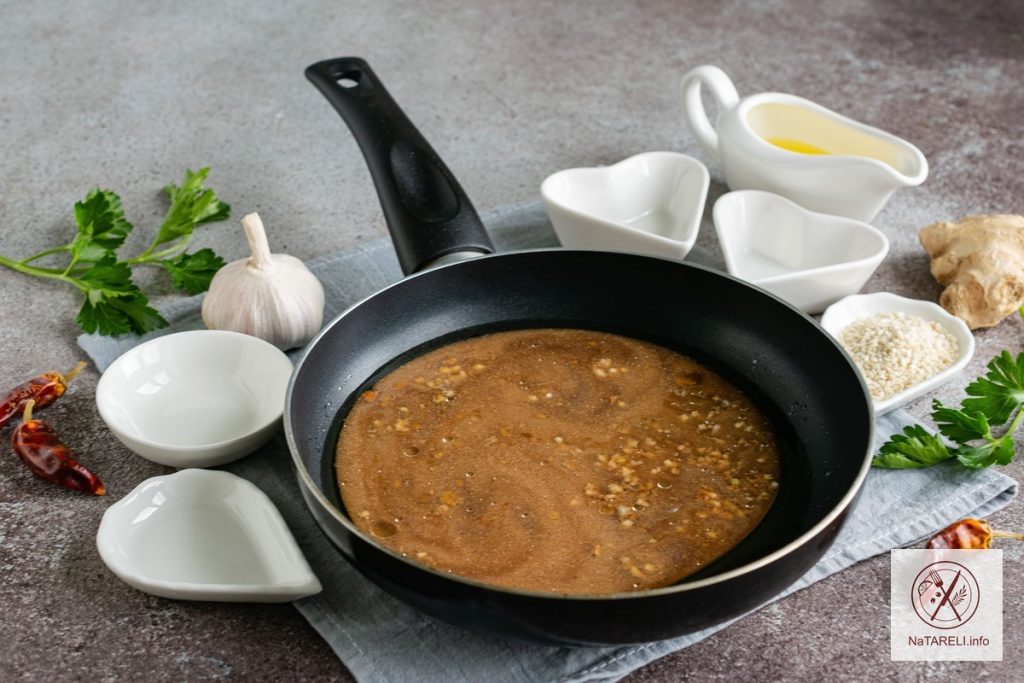
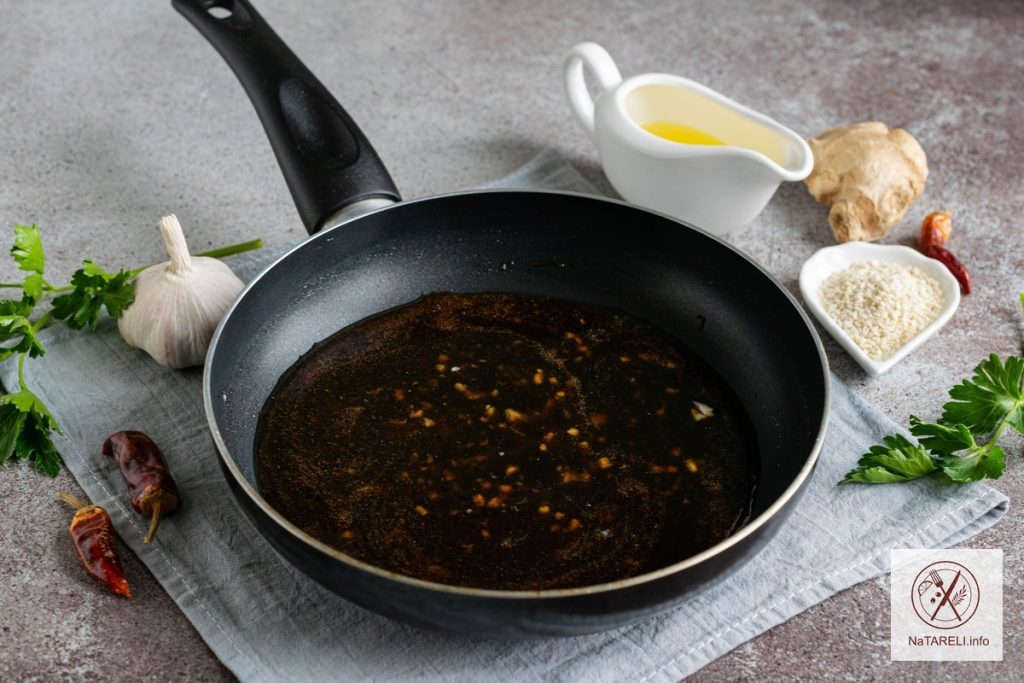
Покрокова інструкція:

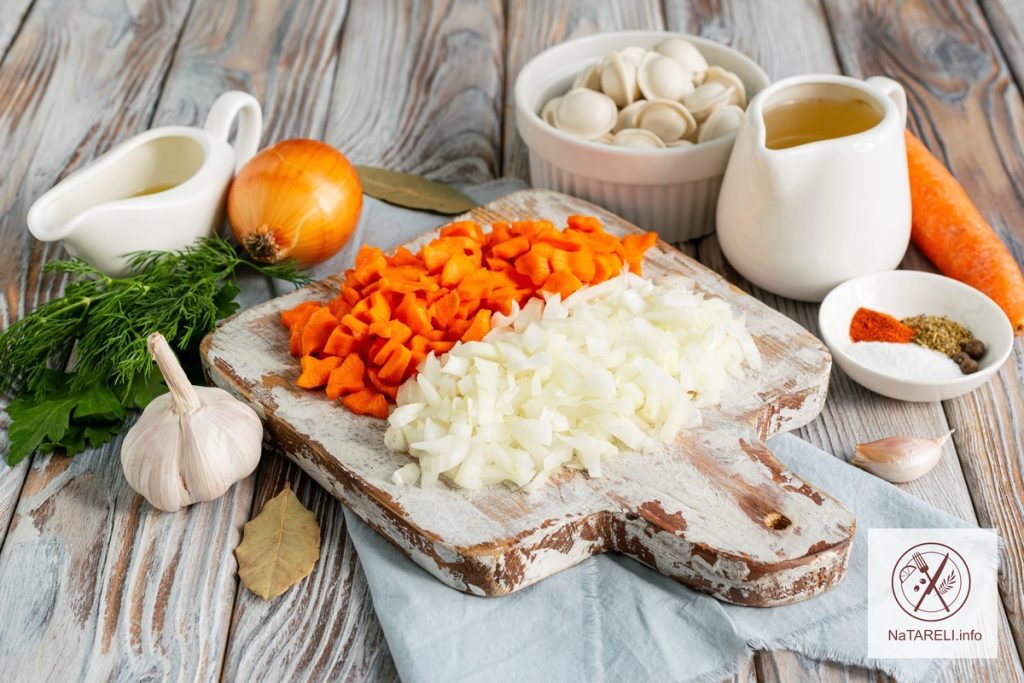
1. Ріпчасту цибулю очищаємо від лушпиння, нарізаємо дрібним кубиком. Зубчики часнику очищаємо від лушпиння, нарізаємо тонкими слайсами.

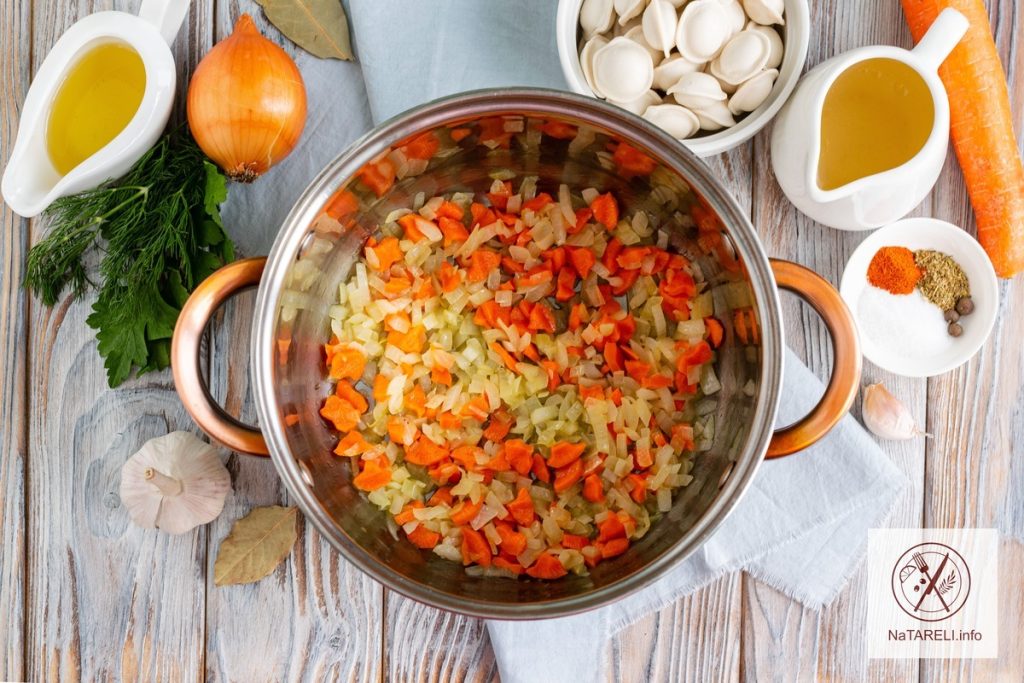
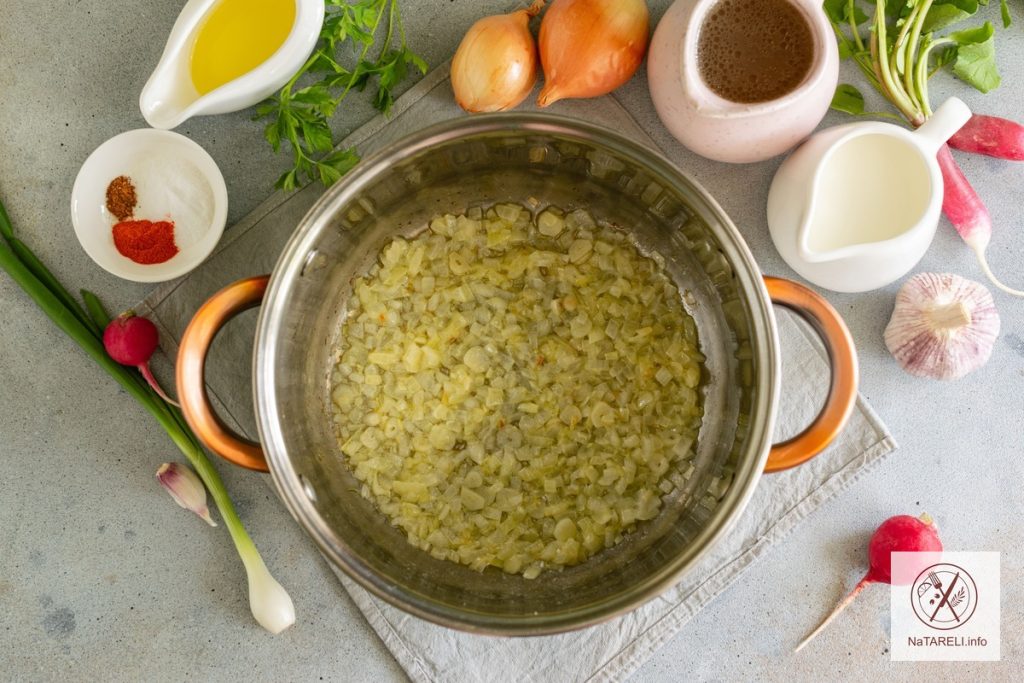
2. У каструлі з товстим дном з’єднуємо вершкове масло та олію. Коли суміш розігріється, викладаємо в неї подрібнену цибулю та часник. Помішуючи, пасеруємо овочі на середньому вогні до золотистого відтінку.

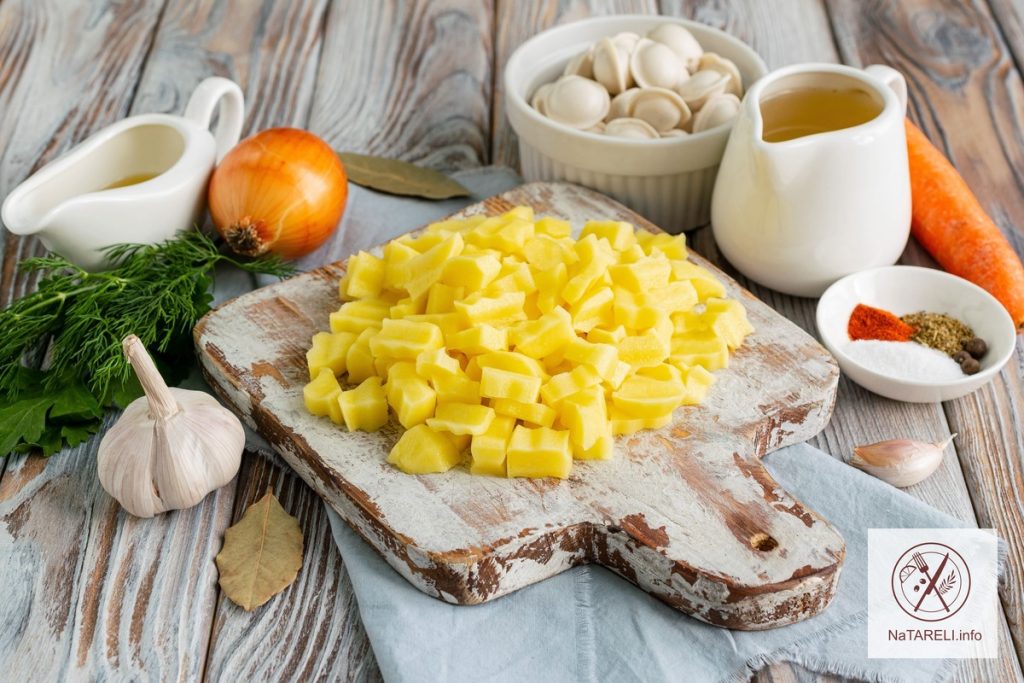
3. Картоплю миємо, очищаємо від шкірки, нарізаємо брусочками.

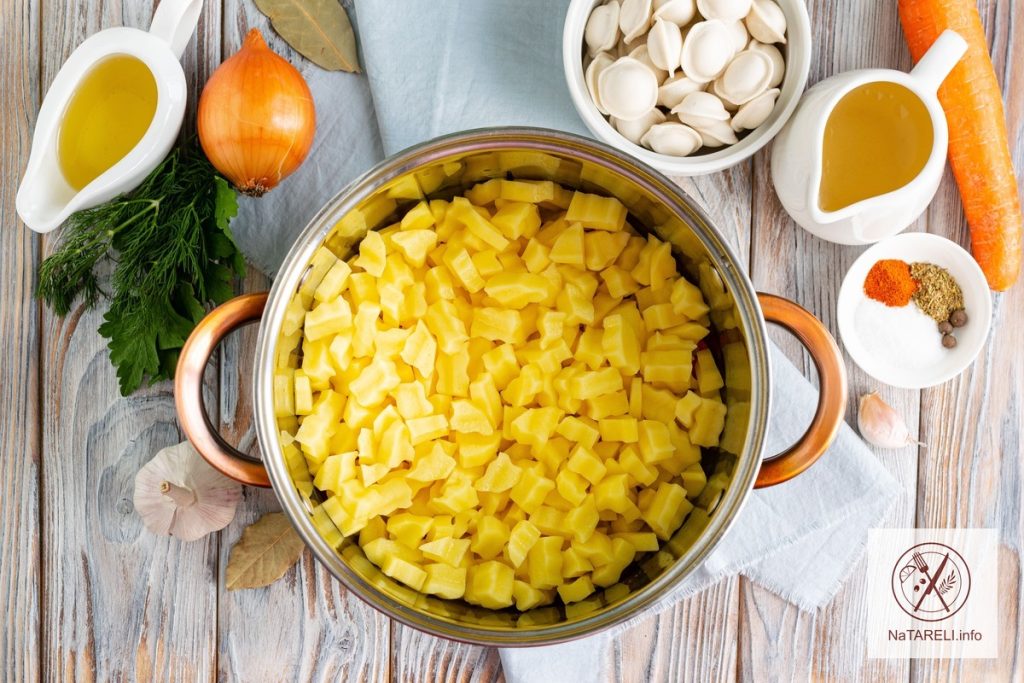
4. Додаємо подрібнену картоплю до пасерованих овочів. Перемішуємо інгредієнти. Помішуючи, продовжуємо обсмажувати овочі разом ще 5 хвилин.

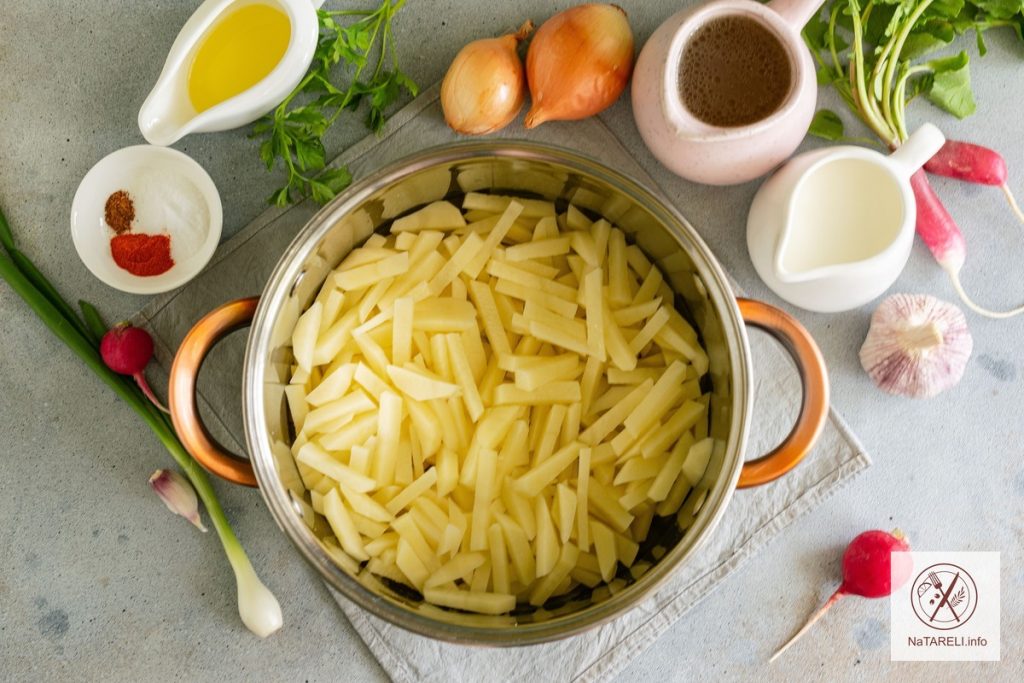
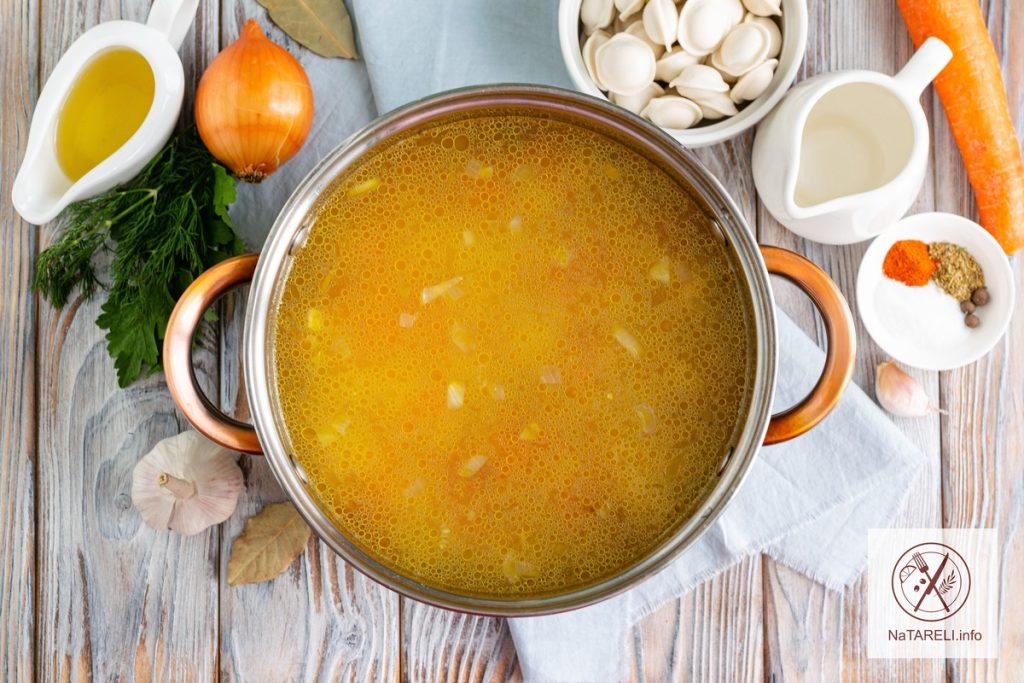
5. Заливаємо овочі гарячим курячим бульйоном. Доводимо суп до кипіння, зменшуємо вогонь до мінімуму. Варимо суп під кришкою до готовності картоплі.

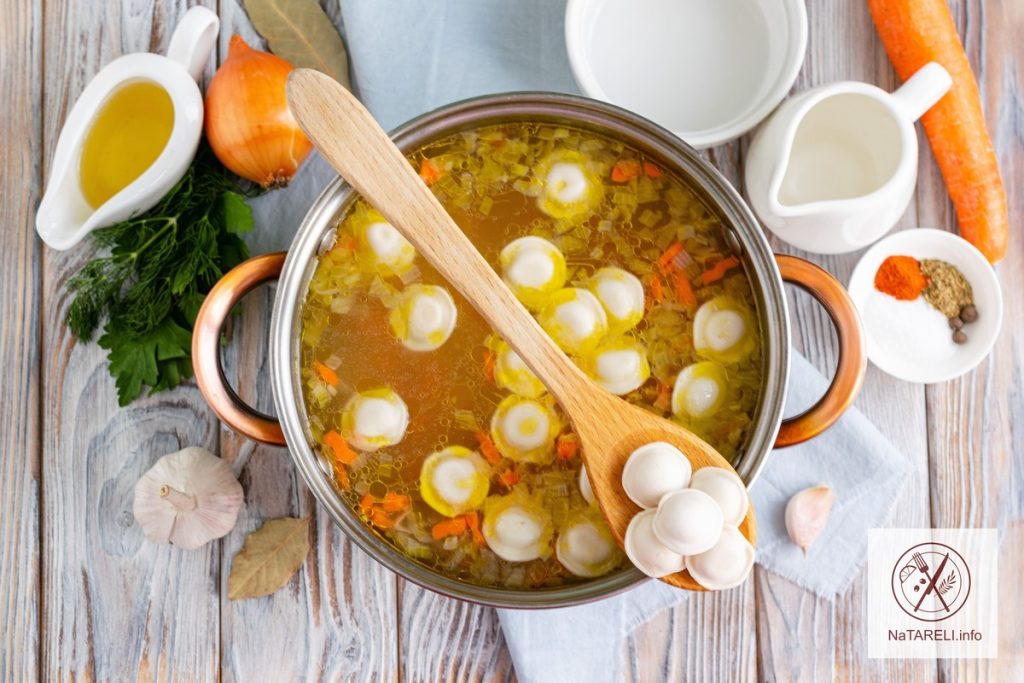
6. Бадилля редису миємо, обсушуємо від зайвої вологи, нарізаємо смужками шириною 1 см.

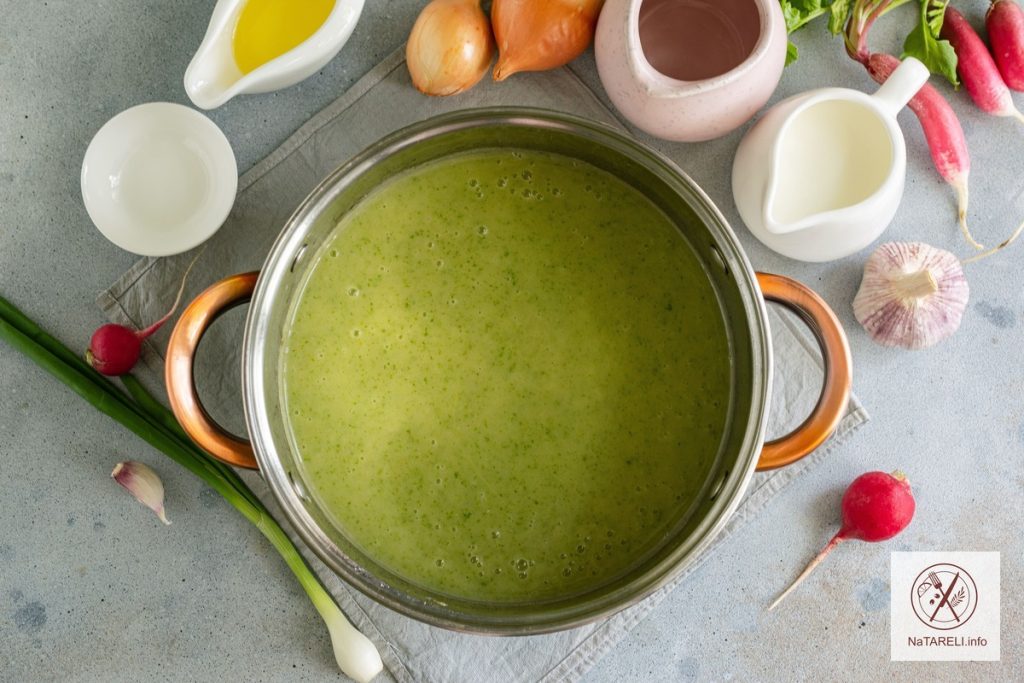
7. Коли картопля в супі дійде до готовності, додаємо в каструлю подрібнене бадилля редиски. Всипаємо сіль та мелені спеції за смаком. Перемішуємо, продовжуємо варити суп на повільному вогні ще 3-4 хвилини. Якщо ви варитимете зелень довше, вона втратить свій яскравий привабливий колір.

8. За допомогою занурювального блендера перебиваємо інгредієнти до однорідної консистенції.

9. Вливаємо в суп теплі вершки. На цьому етапі можна додати до супу 50 г твердого твердого сиру. Найкраще підійде пармезан.

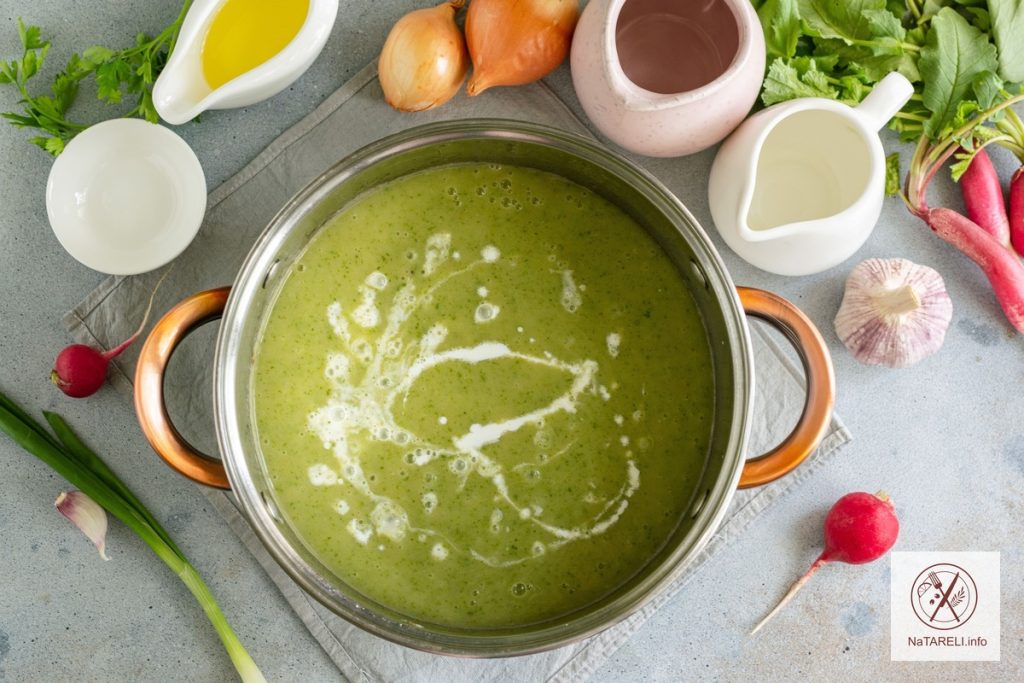
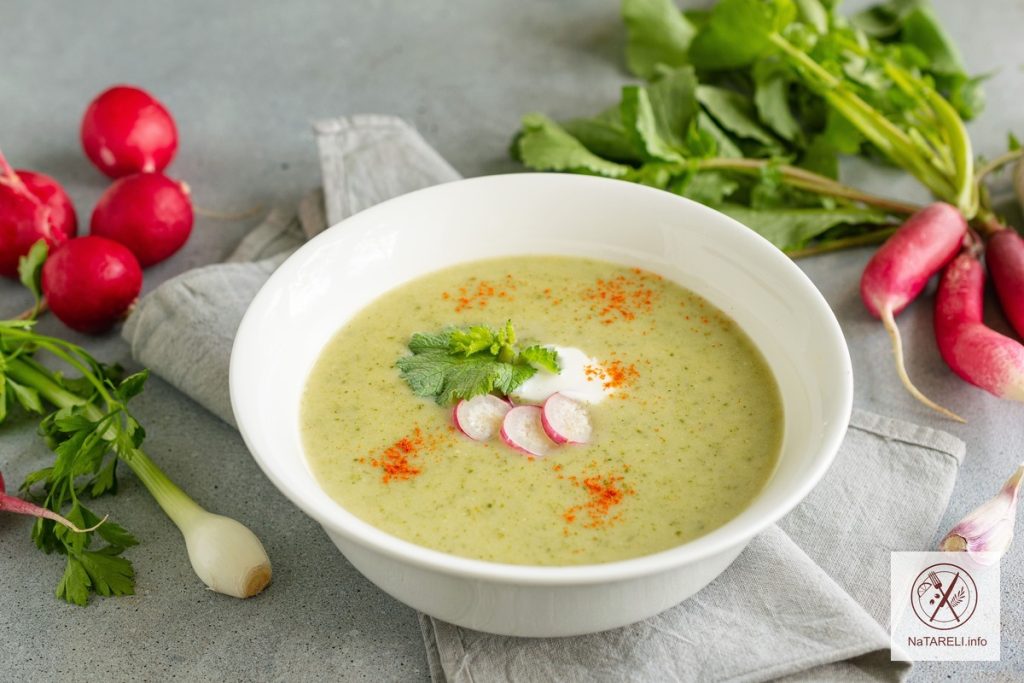
10. Повертаємо суп на плиту, доводимо до кипіння і прибираємо з вогню. Готову страву розливаємо по порційним тарілкам. Прикрашаємо суп з бадилля редиски меленою паприкою, свіжою зеленню та кружальцями редису. За бажанням кожну порцію можна доповнити ложкою сметани.

Смачного!

Зверніть увагу на рецепти смачних супів:

Суп з пельменями та овочами на курячому бульйоні

Суп з вівсяними пластівцями на курячому бульйоні


Chicken in teriyaki sauce

Teriyaki chicken is a popular Asian dish. For this recipe, you can use ready-made savory sweet-salty teriyaki sauce from your nearest supermarket. But I suggest making it yourself, it turns out tastier. Cooking does not require much time and effort. Thanks to the marinade, teriyaki chicken in a frying pan turns out very tender, juicy and aromatic.

Chicken fillet prepared in this way has an original taste, which contains both moderate sweetness and subtle spiciness. If desired, tender dietary meat can be supplemented with carrots, bell peppers or hot chili. Dried flakes can be substituted for fresh chili peppers. Adjust the amount of spices to your taste.

Asian-style chicken goes well with boiled rice, udon noodles or funchose.

Ingredients for cooking chicken in teriyaki sauce:

Recipe for chicken in teriyaki sauce

Step-by-step instruction:

1. In a deep frying pan, mix soy sauce, olive oil and wine vinegar.

2. Add honey, ground ginger, sugar and garlic cloves passed through a press to the mixture.

3. In a separate bowl, mix 50 ml of cold water and 1 teaspoon of potato starch. Pour the resulting mixture into the pan with the remaining ingredients and stir.

4. Place the frying pan with teriyaki sauce over medium heat. Stirring, bring the mixture to a boil. Reduce heat and continue to simmer the sauce for 5-6 minutes until thickened. Remove teriyaki sauce from heat and cool to room temperature.

5. Wash the chicken fillet and dry it from excess moisture with paper napkins. Remove fat and films from the meat. Cut the chicken fillet into oblong pieces across the grain.

6. Transfer the meat to a deep bowl. Pour teriyaki sauce over the chicken pieces, cooled to room temperature. Mix the ingredients and leave the chicken fillet to marinate on the refrigerator shelf for 30-60 minutes.

7. Take the chicken pieces out of the marinade and place them in a frying pan with heated vegetable oil. Stirring, fry the chicken fillet over high heat for 5-7 minutes.

8. When the meat turns white, pour the remaining teriyaki sauce into it.

9. Stirring, continue to cook the chicken fillet over medium heat until the sauce thickens and the meat is completely cooked.

10. Sprinkle the finished dish with sesame seeds, decorate with herbs and serve hot.

Bon appetit!

You might like:

Chicken stew with eggplant and pepper

Chicken in orange sauce


Toasts with sprats

Preparing croutons with sprats. Such a simple but very tasty snack is universal. It is suitable for both breakfast and the holiday table. Toasts with sprats will be an excellent addition to an aperitif before the main course or a wonderful treat for a friendly meeting. The combination of crispy bread soaked in garlic, smoked sprats and hard cheese will not leave anyone indifferent.

You can use any type of bread for the recipe: wheat, rye or multigrain. It can be dried in a toaster or oven, or fried in a dry frying pan or on an electric grill. If desired, croutons can be supplemented with a slice of pickled cucumber or a slice of fresh tomato.

The recipe is very simple and quick, even a young cook can handle it. Prepare the necessary ingredients, follow the step-by-step recipe and enjoy a satisfying and crispy snack!

Ingredients for making croutons with sprats:

Recipe for making croutons with sprats

Step-by-step instruction:

1. Cut white bread into slices 1 cm thick. Place them on a baking sheet covered with parchment. Place the bread in an oven preheated to 180 degrees for 7-10 minutes. When the bread is browned, carefully remove it from the oven.

2. Rub each slice of loaf with a clove of garlic for flavor.

3. Grease the bread with a thin layer of mayonnaise.

4. Place a few sprats on top. The amount of fish can be adjusted to your liking.

5. Boil chicken eggs hard-boiled, cool in cold water, peel, and grate on a coarse grater. Place the grated eggs on top of the canned fish. Add salt and ground black pepper to taste.

6. Grind a piece of hard cheese on a coarse grater. Evenly distribute shavings of hard cheese over the croutons.

7. Decorate the appetizer with fresh herbs.

8. Serve delicious and crispy croutons immediately after cooking.

They are perfect for Sunday breakfast with the whole family.

Bon appetit!

Try cooking:

Toast with avocado, pear and walnuts


Yeast pie with mackerel “Fish”

Fish pie made from yeast dough prepared according to this recipe turns out very tasty! We will use onions and fresh frozen mackerel fillets as filling. It is a fatty and oily fish, so it is great for this purpose. If desired, you can use other small-boned fish, such as pike perch, cod, burbot or salmon. The filling turns out juicy and aromatic, fish lovers will be delighted with such baked goods!

Yeast dough for fish pie deserves special attention. It is easy to prepare, goes well in the oven, and turns out soft and airy. Fish pie with mackerel is hearty, soft, juicy and incredibly tasty. It will certainly become your favorite among savory homemade baked goods!

This pie is, of course, best served hot. However, even when cooled it remains tasty and soft. I hope you enjoy the recipe!

Ingredients for making yeast pie with mackerel “Fish”:

Recipe for yeast pie with mackerel “Fish”

Step-by-step instruction:

1. Prepare yeast dough for fish pie. In a deep bowl, mix sifted wheat flour, sugar and dry yeast.

2. Mix the dry ingredients until smooth using a whisk. Add 1 egg and salt to the resulting mixture.

3. Pour warm milk into the dough.

4. Knead the soft and elastic dough. Add vegetable oil to the dough in small portions and continue kneading until smooth. Cover the finished dough with a towel and leave in a warm place to proof for 1-1.5 hours.

5. After the specified time, the dough will rise and increase in volume by 2-3 times.

6. Form the pie. Knead the finished dough with your hands and, using a rolling pin, roll it out on a sheet of parchment into a rectangular layer 5-7 mm thick.

7. On both sides, cut the dough into strips 2 cm wide, as in the photo. Wash the green onions and chop them into thin rings. Peel the onions and cut into thin half rings. Place two types of chopped onions in the middle of the dough, leaving the edges of the dough 7-10 cm free.

8. Pre-defrost the mackerel. Wash the fish thoroughly under running water, cut off the head, tail and fins with a knife. Carefully cut the belly of the mackerel, remove the entrails, backbone and large bones. Salt and season the mackerel carcass with spices, place the fish on an onion bed.

9. Wrap the filling in the dough, forming a braid. Leave small gaps in the weave to allow steam to escape during baking.

10. On parchment paper, carefully transfer the pie to a baking sheet. Brush the pastry with beaten egg. Place the “Fish” yeast pie in an oven preheated to 180 degrees for 35-40 minutes.

11. Remove the rosy mackerel pie from the oven, cool on a wire rack and cut into portions.

12. Serve the finished baked goods warm as a main course. Bon appetit!

You may like:

Puff pastry pie with canned tuna and eggs

Puff pastry pie with sausage, tomatoes and onions


Salad “Mushroom Basket”

The tasty and appetizing “Mushroom Basket” salad will decorate any holiday table; it looks very elegant and appetizing. The salad turns out very tasty and satisfying, all the ingredients go well together, complementing each other. Processed cheese adds a creamy touch to the dish. Pickled cucumbers make the salad juicy and perfectly highlight the taste of the other ingredients. If desired, the ham can be replaced with boiled pork or smoked chicken fillet.

“Mushroom Basket” can be served in portions in bowls or wide glasses. I prepared the salad using a cooking ring with a diameter of 18 cm.

The classic combination of ham and mushrooms is wonderfully complemented by fresh herbs. This salad will definitely be remembered by your guests!

Ingredients for preparing the “Mushroom Basket” salad:

Recipe for “Mushroom Basket” salad

Step-by-step instruction:

1. Wash the potatoes, peel them, and boil them in salted water until tender. To make the vegetables aromatic, add bay leaves and black allspice to the water during cooking. Cool the boiled potatoes to room temperature and grate them using a coarse grater. Place a cooking ring with a diameter of 18 cm on a flat plate. Place the grated potatoes and grease them with a small amount of mayonnaise.

2. Cut the pickled cucumbers into small cubes, squeeze out excess liquid and place on top of the potatoes. Apply a thin mesh of mayonnaise on top.

3. Boil chicken eggs hard, cool in cold water, peel, and chop on a coarse grater. Place the grated eggs into the cooking ring. Add salt and ground black pepper to taste. Lubricate the layer with a small amount of mayonnaise.

4. Cut the ham into small cubes, place on top of the eggs, tamping the salad a little with a spoon. Apply a mayonnaise mesh on top.

5. Grind the processed cheese on a grater with a large blade. Distribute the grated cheese evenly over the ham. To make the processed cheese easier to grate, you can pre-chill it in the freezer for 20 minutes. Apply a mayonnaise mesh over the cheese layer.

6. Wash the dill, parsley and green onions, dry them to remove excess moisture, and chop them finely. Add greens to the salad.

7. Place honey mushrooms, strained from the marinade, on top.

8. Cover the culinary ring with the salad with cling film. Place the “Mushroom Basket” salad in the refrigerator for 2 hours to soak and cool. Before serving, carefully remove the cooking ring and serve the salad to the festive table.

Bon appetit!

Pay attention to the recipes for delicious salads:

Korean salad with crab sticks and carrots

Salad “Mimosa Branch”


Korean carrots

Korean carrots are an all-season dish. In the warm season, it is a complete side dish for meat cooked on coals and a filling for appetizers in pita bread. In autumn and winter, spicy carrots become an indispensable ingredient in vitamin-rich salads.

It seems that not a single holiday is complete without it. The appetizer turns out to be very juicy, aromatic and moderately spicy. The amount of spices and garlic can be adjusted to your taste. Coriander gives the appetizer a characteristic nutty-spicy flavor, so don’t be lazy about purchasing this spice for the recipe. If you use coriander grains, you must first grind them in a mortar. Additional ingredients for Korean carrots are sugar and vinegar, which give the vegetables a subtle sweet and sour note.

In a hurry, healthy and tasty, bright and juicy Korean carrots according to this recipe turn out to be much tastier than store-bought ones!

Ingredients for cooking carrots in Korean:

Korean carrot recipe

Step-by-step instruction:

1. Wash the carrots, peel them. Grind the vegetables into long thin strips on a grater to prepare Korean carrots. Transfer the carrots to a deep bowl.

2. Prepare the marinade. In a ladle or small saucepan, mix salt, sugar and ground spices. Add bay leaves for flavor.

3. Pour in cold water, refined vegetable oil and 6% apple cider vinegar. Stirring constantly until the salt and sugar are completely dissolved, bring the marinade to a boil.

4. Pour hot marinade over the grated carrots and stir.

5. Add garlic cloves passed through a press to the appetizer.

6. Fry sesame seeds in a dry frying pan until golden brown.

7. Add sesame seeds to Korean carrots and mix.

8. Transfer the snack into a glass bowl and seal it with a lid. Place the Korean-style carrots in the refrigerator for 3-4 hours so that the vegetables are marinated and cooled.

Korean carrots can be served as a cold appetizer or used to make various salads or homemade hot dogs.

Bon appetit!

Pay attention to the recipes of delicious snacks:

Lavash roll with chicken and cottage cheese in the oven

Chicken liver brawn with vegetables


Easter cake

Easter is a time when the house is filled with the aromas of freshly baked Easter cake, memories of childhood and the joy of meeting loved ones. For many new bakers, making this holiday dessert may seem like a daunting task. But I was convinced from my own experience that anyone can bake a delicious and aromatic Easter cake, even without many years of practice!

Today I invite you to prepare a tender, airy and fibrous Easter cake. The main thing is to strictly follow all the recommendations, and your baked goods will turn out beautiful, soft and very fragrant.

Porous and light as a cloud, the cake will become a real table decoration! An important secret to good and tasty Easter cake dough is that you only need to knead it with love, in silence and with God in your soul.

Ingredients for making Easter cake:

Easter cake recipe

Step-by-step instruction:

1. For the sourdough, mix warm milk (30-35 degrees), fresh yeast and honey in a deep bowl. Mix the ingredients with a whisk until smooth.

2. Add sifted wheat flour to the dough.

3. Mix the ingredients until smooth. Cover the bowl with the sourdough with cling film or a dry towel. Leave the sourdough in a warm place for 20 minutes for the yeast to activate.

4. In a deep bowl, mix chicken eggs with sugar, salt and vanilla. At maximum speed of the mixer, beat the ingredients for 7-10 minutes until a fluffy and light mass is obtained.

5. Melt the butter on the stove or in the microwave, cool to room temperature, add to the beaten eggs. Pour the appropriate sourdough into the mixture.

6. Mix the ingredients with a whisk until smooth.

7. Add sifted wheat flour mixed with baking powder to the dough.

8. Using a mixer with a hook attachment, knead the dough for 15 minutes. The finished dough should be elastic and not stick to your hands. If you knead the dough by hand, it will take twice as long.

9. Cover the bowl with the dough with cling film or a dry towel. Place the dough in a warm, draft-free place for 1 hour. After the specified time, the dough should increase in volume by 2-3 times.

10. Sort out the raisins, wash them, and pour boiling water over them for 10 minutes. Dry the dried fruits to remove excess moisture and add to the dough. Using a fine grater, remove the zest from one lemon and add it to the Easter cake dough. Stir raisins and lemon zest into the dough.

11. Divide the dough into 3-4 parts depending on the diameter of the mold you use. I have 2 metal molds for Easter cakes with a diameter of 10 cm and 1 small mold with a diameter of 8 cm. The height of all forms is 12 cm. Form balls from the dough so that the raisins are inside. Place them on the bottom of metal molds greased with vegetable oil.

12. Cover the molds with the dough with cling film or a dry towel and leave in a warm place to proof. When the dough has almost reached the top of the molds, place them in an oven preheated to 160 degrees for 45-50 minutes. When the top of the cake is browned, remove the baked goods from the oven. Carefully remove the finished cakes from the molds and cool to room temperature.

13. To prepare the glaze, beat the chilled chicken protein with a mixer until foamy. Add powdered sugar and a pinch of vanillin for flavor.

14. At maximum speed of the mixer, beat the ingredients until a fluffy and light mass is obtained. Pour 1 tablespoon of lemon juice into the glaze. Continue beating the ingredients with a mixer until stiff peaks form.

15. Apply the finished protein glaze to the cooled Easter cakes. Decorate Easter baked goods with confectionery sprinkles.

Easter cakes can also be decorated with nuts, dried fruits, candied fruits, and mastic figures. Leave the baked goods at room temperature for 2-3 hours until the glaze hardens completely.

I wish you a Happy Easter, peace and goodness.

Bon appetit!


Soup with dumplings and vegetables in chicken broth

Today on the menu is a hearty and rich express dish that is perfect for lunch. Its preparation does not require much time, which is sometimes very important, and the result is excellent! Soup with dumplings and vegetables can be prepared with water, but it will taste better with vegetable or chicken broth.

This simple and flavorful soup is a godsend for housewives who need to quickly and satisfyingly feed their family a hot lunch. For the recipe, it is best to use homemade dumplings made from minced chicken or pork and beef. But small soup dumplings from the store will also work.

If desired, you can add a spoonful of sour cream to each serving of soup before serving. Have fun in the kitchen!

Ingredients for making soup with dumplings and vegetables in chicken broth:

Recipe for soup with dumplings and vegetables in chicken broth

Step-by-step instruction:

1. Peel the onions and cut them into small cubes. Wash the carrots, peel them, cut them into small pieces using a curly knife.

2. Pour vegetable oil into the bottom of a thick-bottomed pan. When it warms up, put the chopped vegetables into the pan. Stirring occasionally, sauté the onions and carrots until light golden brown.

3. Wash the potatoes, peel them. Cut the vegetables into small pieces using a curly knife.

4. Add chopped potatoes to the pan with sautéed vegetables.

5. Pour two liters of hot chicken broth over the ingredients. Cover the pan with a lid and bring the ingredients to a boil. Cook the soup over low heat for 5 minutes.

6. Add frozen dumplings to the pan. Stir and continue cooking the soup for another 10 minutes.

7. Add finely chopped parsley and dill, salt and spices to the soup. Stir, boil the soup for another 1 minute, then turn off the heat.

8. Pour the finished soup with dumplings into portioned plates and serve. A tasty and satisfying lunch is ready!

Bon appetit!

You might like:

Oatmeal soup with chicken broth

Soup with canned fish and rice


Chicken stew with eggplant and pepper

I offer you a delicious dinner option. Both a side dish and a main dish in one! We will cook chicken stewed with eggplants and sweet peppers. I used chicken thighs for this recipe, but you can use drumsticks, wings, or fillet pieces.

This dish is prepared simply and quickly, and you will certainly enjoy it. Chicken with eggplant and bell pepper is aromatic, satisfying and incredibly tasty. Meat and vegetables are soaked in each other’s juices, making the dish incredibly tasty and aromatic.

In addition to vegetables, you can add fresh mushrooms, such as oyster mushrooms or champignons. Mashed potatoes or rice can serve as a side dish.

Ingredients for making chicken stew with eggplant and pepper:

Recipe for stewed chicken with eggplant and pepper

Step-by-step instruction:

1. Wash the chicken thighs and dry them from excess moisture with paper napkins. Rub the meat with a mixture of salt and ground spices on all sides. Leave the chicken for 30 minutes to marinate.

2. Place chicken thighs, skin side down, in a frying pan with heated vegetable oil.

3. Fry the chicken pieces over medium heat until golden brown on both sides.

4. Prepare the vegetables. Wash the eggplants, peel them, cut into quarters into rings 1.5 cm thick. Peel the onions, cut into quarters into rings 3 mm thick. Wash the bell pepper, cut it in half, remove the seed box, cut into strips the same thickness as the onion.

5. Add chopped eggplants to the pan with the fried chicken.

6. Place onions and bell peppers on top.

7. Gently mix the ingredients. Cover the pan with a lid and simmer the chicken thighs with vegetables over low heat. Stir the ingredients occasionally to ensure they cook evenly. During heat treatment, vegetables will release juice and significantly decrease in size. After 25-30 minutes, add garlic and finely chopped dill to the vegetables with chicken. They will give the dish a special aroma. Add salt and spices to taste.

8. Stir, continue to simmer the chicken thighs with vegetables for another 1-2 minutes, then turn off the heat. Serve the stewed chicken with eggplant and bell pepper immediately after cooking, until it has cooled.

Bon appetit!

Try another delicious chicken recipe:

Chicken in orange sauce


Cake Napoleon with custard

If you ask yourself what you would like for dessert, what comes to your mind first? Of course, cake! The classic Napoleon with custard turns out perfectly tender and tasty, it’s hard to refuse such a pleasure. Lots of thin crispy cakes coated with delicate vanilla cream – this is exactly what an ideal Napoleon cake should be. It is suitable for any holiday and will always be one of the most popular and favorite desserts.

The finished dough can be frozen and stored in the freezer. The cakes can be baked in advance, well packed in cellophane and stored in a dry place until the cake is assembled, which is very convenient. Thinly rolled cakes bake almost instantly. Even a novice housewife can easily prepare custard. All that remains is to grease the cooled cake layers, decorate the cake with crumbs, lick the spoon and wait until the morning to enjoy a piece of the delicate dessert.

Crispy puff pastries, when soaked, become soft and turn into a real delicacy. If you haven’t tried this deliciousness yet, I recommend you try it. For the recipe we will use a 250 ml glass.

Ingredients for making Napoleon cake with custard:

Recipe for Napoleon cake with custard

Step-by-step instruction:

1. Cut cold margarine into small pieces, mix with sifted wheat flour in a blender bowl until smooth.

2. In a 250 ml glass, beat 1 chicken egg with a fork. To make the cakes crispy, add 2 tablespoons of 9% vinegar to the egg.

3. Add cold water to the mixture, filling the glass completely. Pour the resulting mixture into the bowl with the dough. Quickly mix the ingredients using a blender, achieving a homogeneous dough consistency.

4. The dough for the cakes should be soft and elastic. We form 8 balls of the same size from it. Place them in the freezer for 40 minutes to cool.

5. Then take 1 ball of dough out of the freezer and roll it out into the thinnest layer possible on a floured work surface. Cut out a circle with a diameter of 25 cm from the dough. Prick the dough with a fork so that the cake does not deform during baking.

6. Transfer the workpiece to a baking sheet covered with parchment. Bake the cake in an oven preheated to 220 degrees for 5-7 minutes until light golden brown. While one cake is baking, roll out and prick the next one with a fork. Connect the dough scraps together, cool in the refrigerator and roll out again into a thin crust.

7. For the custard, combine sugar, vanillin and wheat flour in a deep saucepan. Mix the ingredients with a whisk.

8. Beat 6 chicken eggs into the mixture. Mix the ingredients until smooth.

9. Stirring constantly, pour hot milk into the resulting mixture in a thin stream.

10. Place the pan with the cream on low heat. Stirring constantly, bring the cream to a boil and remove it from the heat. Cover the custard with cling film and cool it to room temperature.

11. Combine softened butter with sugar. Beat the mixture with a mixer until smooth.

12. Add 1-2 tablespoons of custard to the resulting mixture. Continue beating the ingredients until smooth.

13. In this way, mix all the custard into the butter mixture.

14. Now all that remains is to assemble the cake. Spread each cake with a thin layer of custard, forming a Napoleon.

15. Grease the top and sides of the cake with cream. Grind several cakes into crumbs using a blender. Decorate the cake with crumbs.

16. Place Napoleon in the refrigerator for 12 hours to allow it to infuse and soak.

17. Serve delicious and tender Napoleon cake with tea or coffee.

Bon appetit!

You may also like this delicious cake recipe:

Delicate nut cake